13 Long Layered Hairstyles for Thick Hair Over 50
Thirteen long layered hairstyles judged on one question: does this layering strategy suit your thick hair? Each idea includes what to ask your stylist.

Booking an appointment soon? Save this page. It is easier to skim in the chair than to remember.
At a glance
Works
- A long V-cut with internal layers when your hair is heavy but you want to keep the length — bulk comes out without losing the silhouette
- A deep side part on any long layered cut when your face is round or heart-shaped — asymmetry works without cutting shorter
- Curtain bangs on thick long hair — strand weight holds the parting, so the fringe stays put instead of collapsing
Depends
- A long shag with disconnected layers — works for straight-to-wavy thick hair, but coarse curly thickness can go frizzy at the disconnection points
- Long feathered layers from the cheekbone — flatters a square jaw, but only if your strand diameter holds the feathered ends without going thin
- Collarbone-length transitional layers — the right entry cut if you are leaving waist-length behind, but the wrong one if you are not ready to lose six inches
Skip
- Heavy blunt bangs on thick hair that also waves — the bulk fights the bang and it puffs rather than lies flat
- Extreme razor-texturizing on fine-diameter thick hair — it removes structure that fine strands cannot rebuild
- An undercut wider than the covered section — visible when wind or movement parts the hair over it
Thick hair over 50 is not a problem to solve. It is a material with specific structural properties, and the question is which layering strategy uses them well.
The thirteen cuts below are not ranked. Each one answers a different thick-hair situation, and the right choice depends on where your bulk sits and how much of it you want to keep.
1. Long V-Cut With Internal Layers
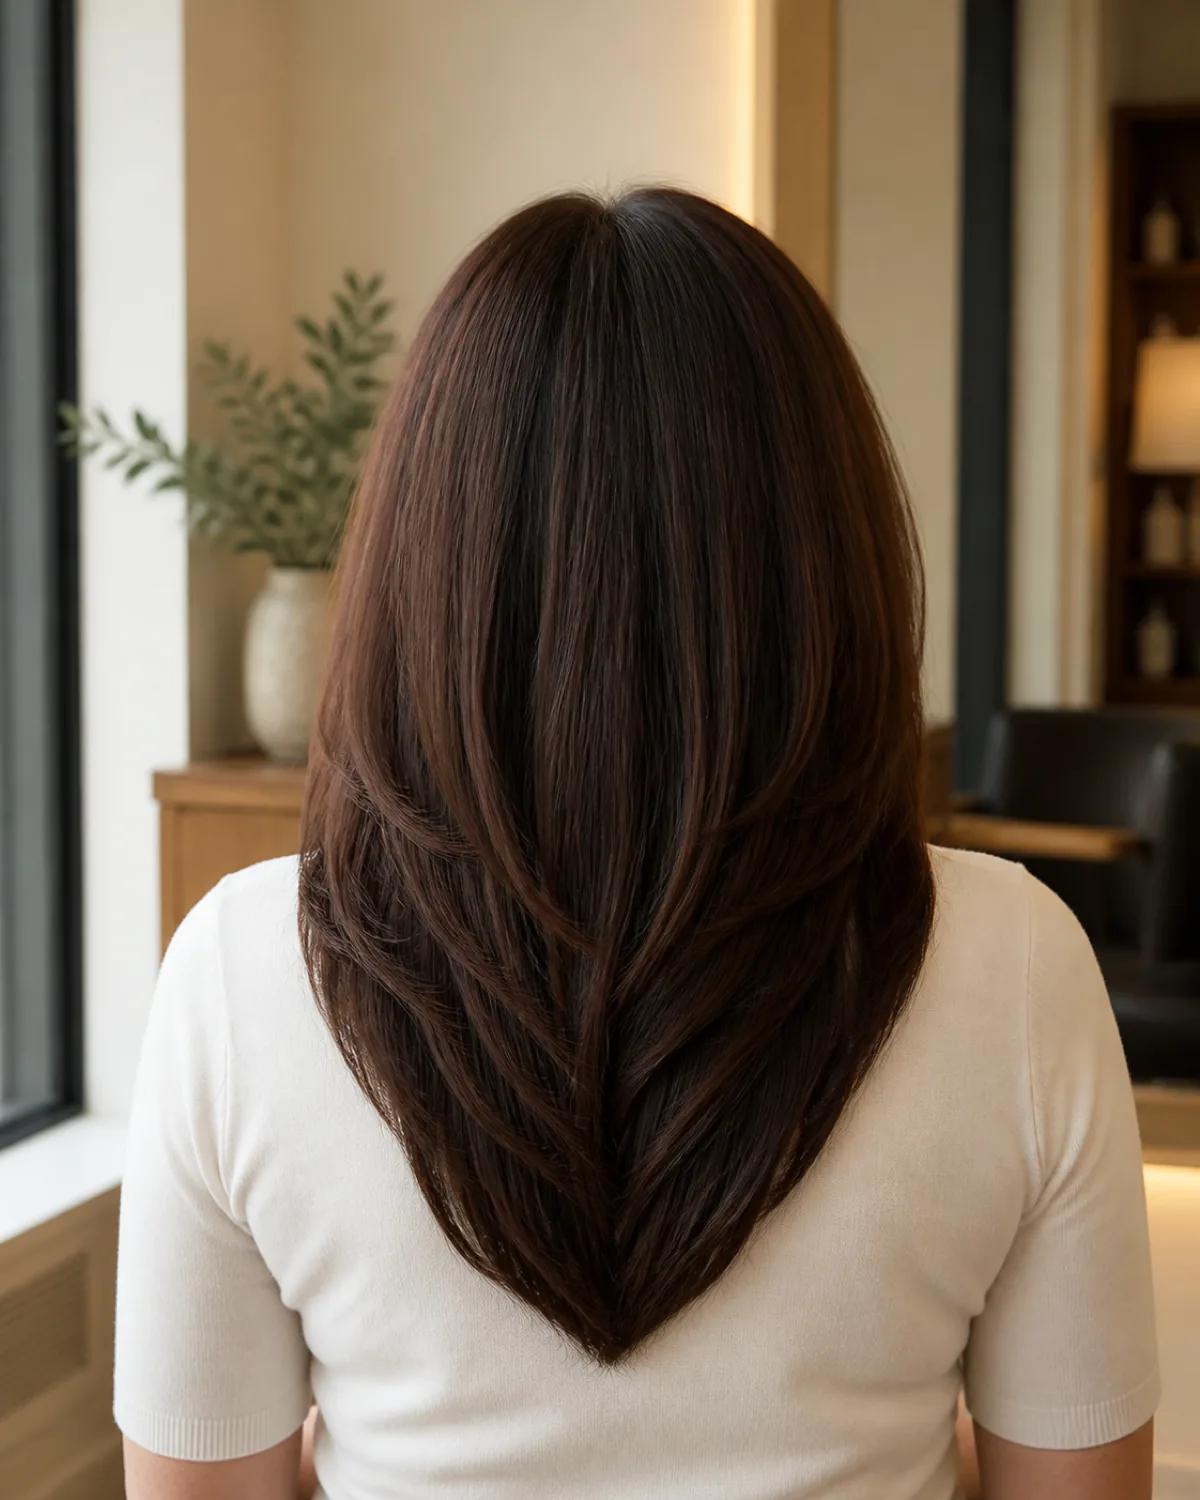
The V-cut tapers the perimeter to a point at the center back while internal layers remove bulk through the mid-shaft. The result is a silhouette that reads as long from behind but moves as though it weighs less than it does. The perimeter stays clean because the weight removal happens inside, not at the edges.
This works best when your hair is uniformly thick from root to tip. If your ends are already thinning while the mid-lengths are dense, internal layering can make the tips look sparse.
- Ask your stylist to remove weight through the interior while keeping the V-shaped perimeter intact
- Confirm whether your ends are dense enough to hold the tapered point. If not, a U-shape may serve better
- Ask how often the internal layers need refreshing before the bulk builds back up
- Bring a photo of your hair pulled back so the stylist can see your natural density pattern
2. Face-Framing Layers Starting at the Jawline
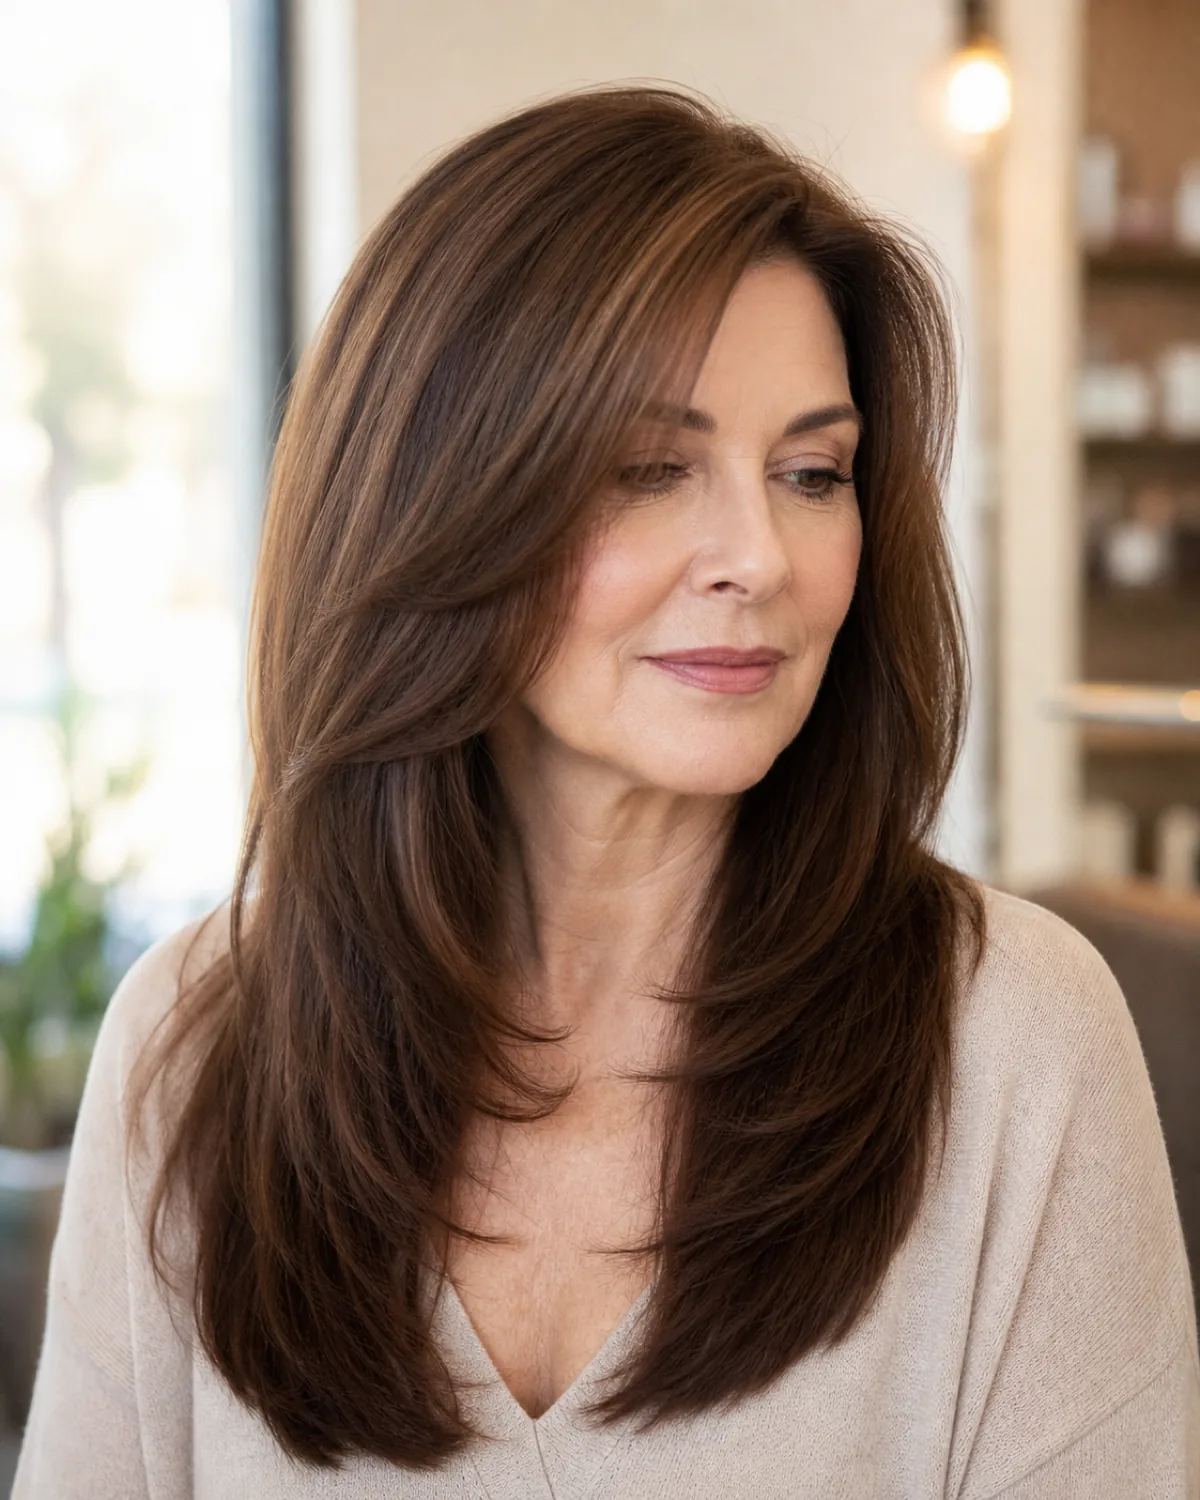
Face-framing layers pull the eye inward at the jaw. On thick hair, the shorter front pieces have enough weight to hold their swing without going limp, which is the advantage fine hair does not have. The back stays long and full while the front does the shaping work.
The judgment here is length: too short and the framing pieces flip out rather than swing in. Too long and they blend into the rest of the hair and do nothing. The shortest piece usually sits at the jaw or just below it, depending on your face shape.
- Ask your stylist where the shortest face-framing piece should fall relative to your jawline
- Confirm whether the pieces should angle inward (which narrows) or sit straight (which widens)
- Ask if you need the framing pieces on both sides or if a deeper part makes one side enough
- Note whether your hair flips or curves naturally, because flip-prone hair needs the framing pieces longer
3. Curtain Bangs on Long Thick Hair
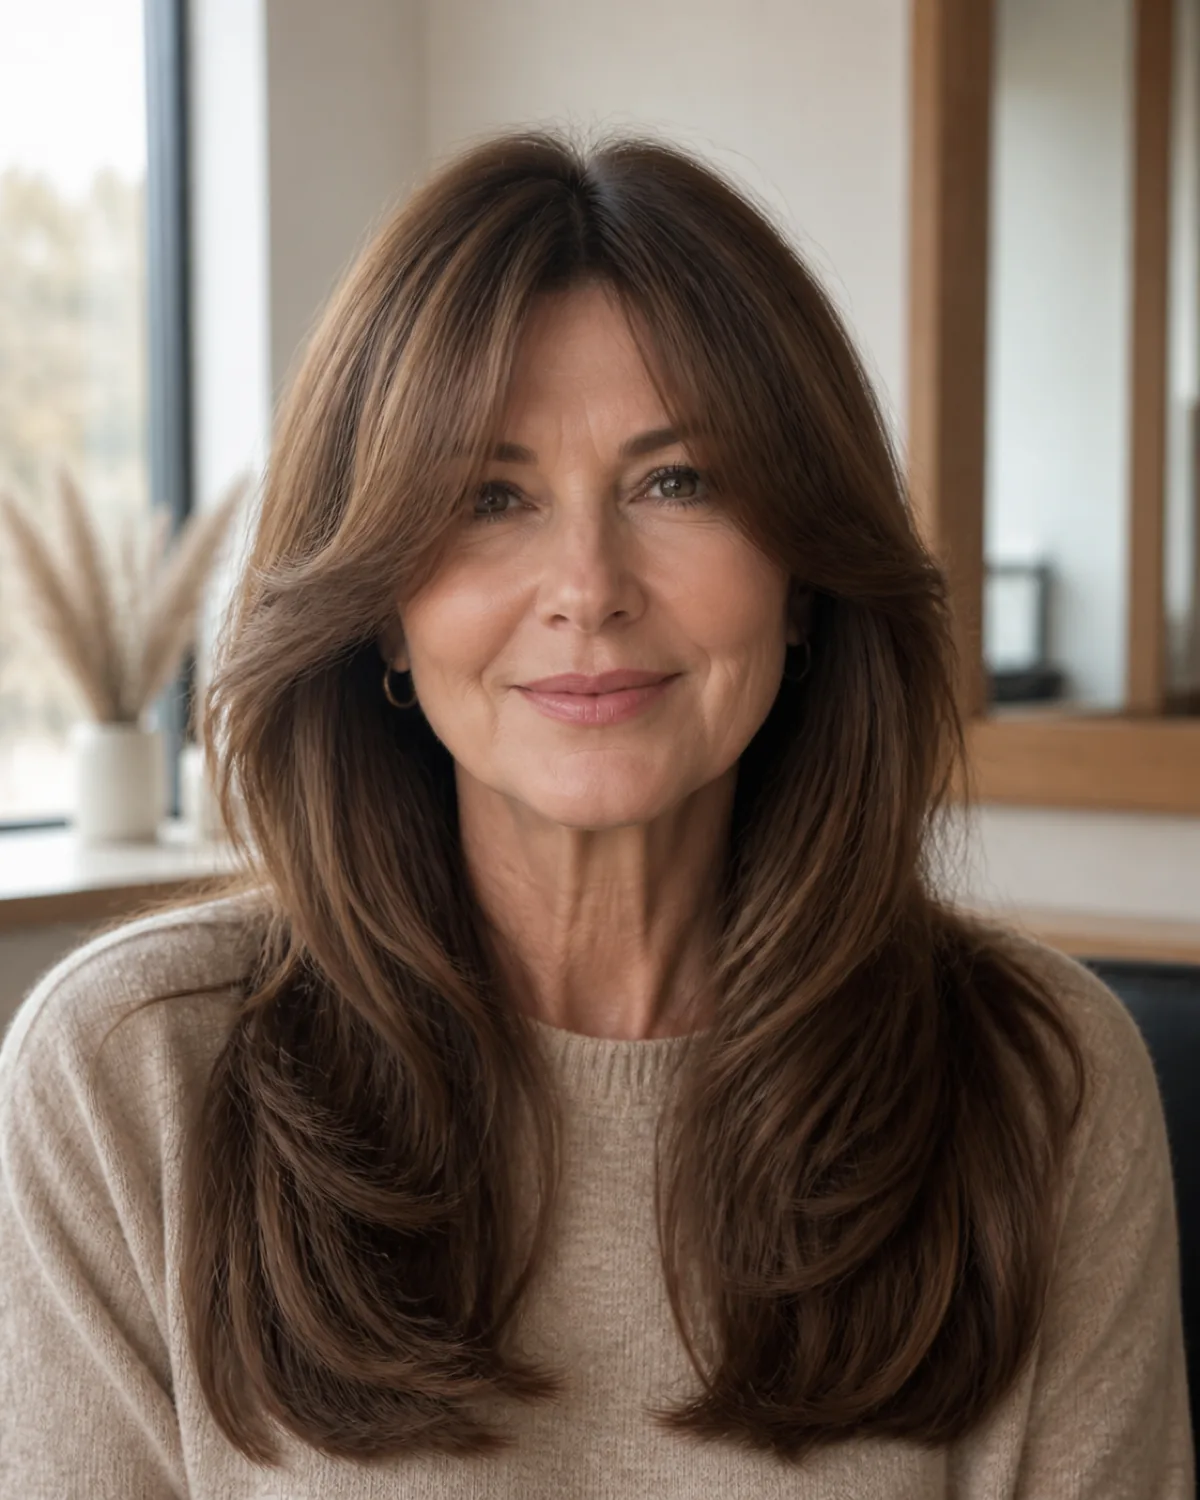
Thick hair holds curtain bangs in place because the strand weight keeps the center parting open. On thinner hair, curtain bangs tend to collapse flat against the forehead. On thick hair, the natural bulk keeps the two halves separated and the fringe reads as deliberate.
The trade-off is density in the fringe section itself. A stylist cutting curtain bangs on thick hair has to decide how much hair to commit to the fringe. Too much and the bangs overpower the face. Too little and you lose the weight advantage.
- Ask how thick the fringe section should be, measured in finger-widths from the center part
- Confirm the longest point of the curtain should hit your cheekbone or your jaw
- Ask whether the parting will hold on its own or whether you need to train it with a few weeks of pinning
- Bring a photo of a day when your hair cooperated and one when it did not. The difference tells the stylist about your texture
Where to start
Find your situation, skip ahead
Your thick hair reaches past your shoulders and you want to keep the length but lose the bulk
Internal layering or a V-cut removes weight without losing the silhouette. Start with Ideas 1 and 8.
01 Long V-Cut With Internal Layers08 One-Length Blunt Cut With Invisible Thinning
Your thick hair is making your face look wider or heavier than you want
Face-framing layers or a deep side part shift volume away from the problem. Try Ideas 2, 9, and 7.
02 Face-Framing Layers Starting at the Jawline09 Long Layers With a Deep Side Part07 Long Feathered Layers From the Cheekbone
You want maximum movement and you are open to a visible change
A shag or razor-cut layers give the most swing, but commit you to a different silhouette. Ideas 4 and 11.
04 Long Shag With Heavy Disconnected Layers11 Long Razor-Cut Layers for Natural Movement
4. Long Shag With Heavy Disconnected Layers
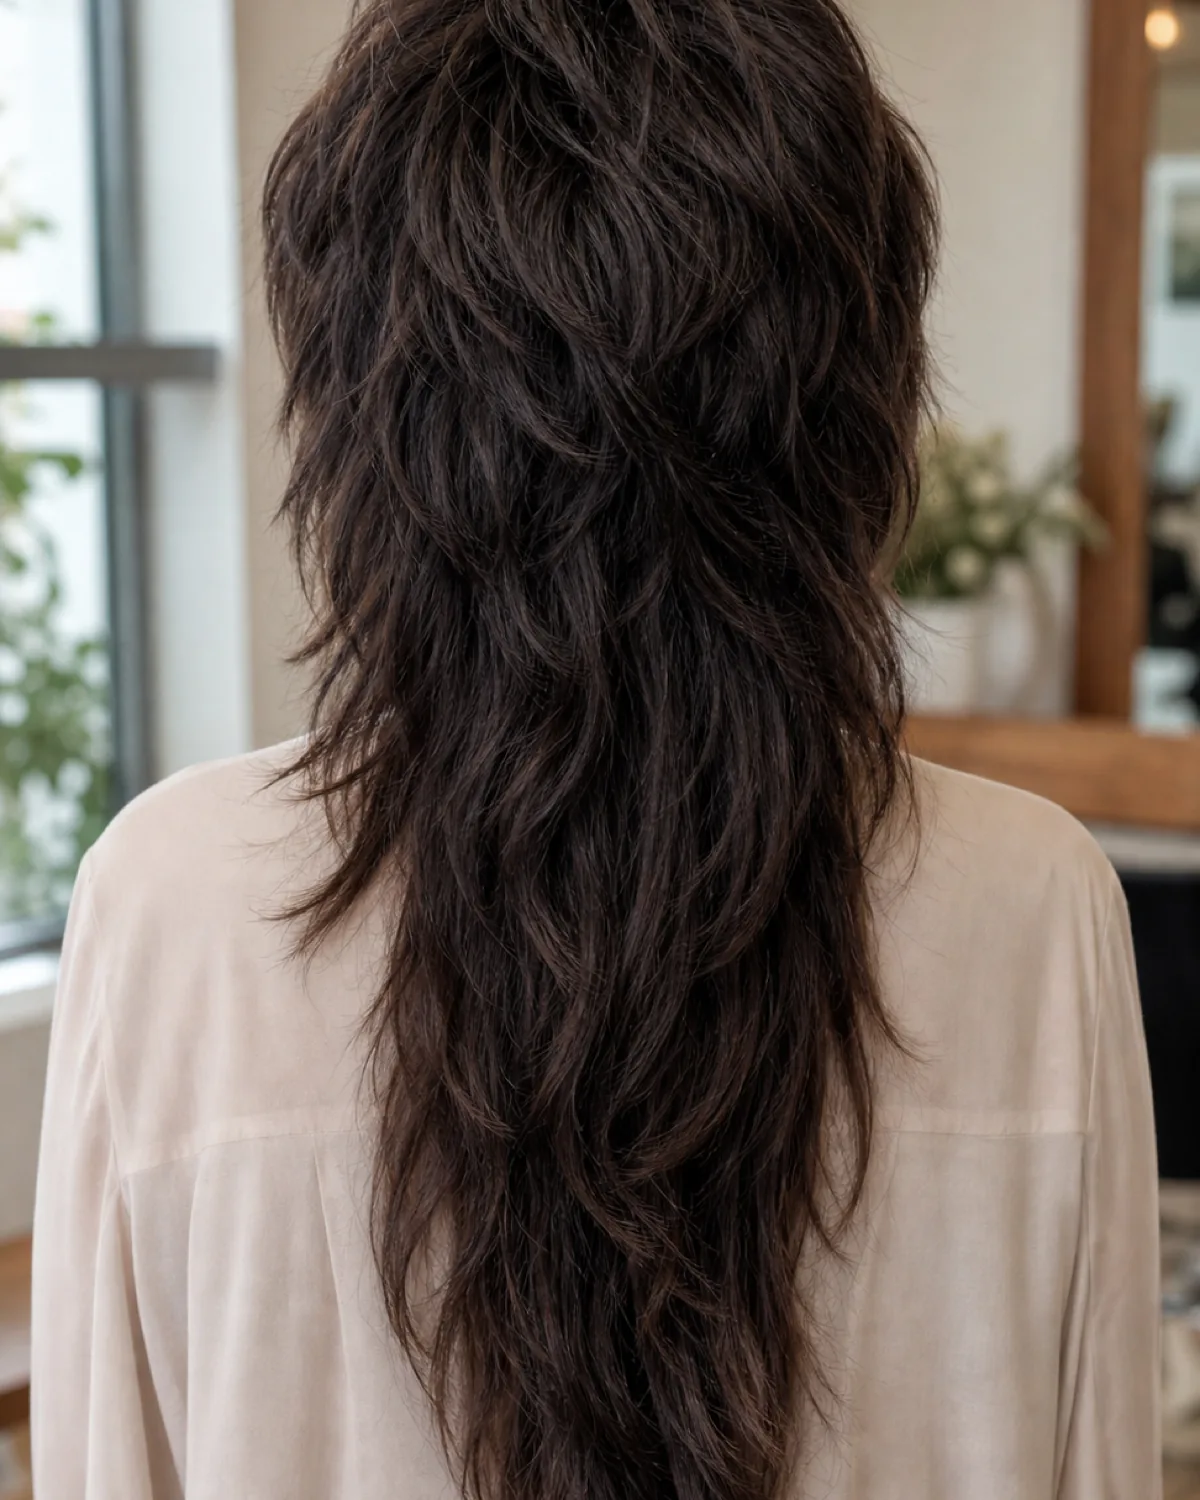
The long shag is the most dramatic layering option here. Short choppy pieces at the crown stand up with visible volume, and then the length drops away through the back with no smooth graduation between the two. That gap is the disconnection, and it creates the movement that makes a shag read differently from standard layers.
On thick hair, this works because you have enough density at the crown to hold the short layers upright. The risk is frizz: coarse or curly thick hair can expand at the disconnection points and read as unfinished rather than textured.
- Ask how short the crown layers need to be to stand on their own without product
- Confirm how much disconnection your hair type can handle before it goes frizzy
- Ask whether you need texturizing at the disconnection points or if your natural texture does the work
- Understand that a shag changes your silhouette visibly. Ask to see photos of it on hair similar to yours
5. Chest-Length Layers Stepped at Two-Inch Intervals
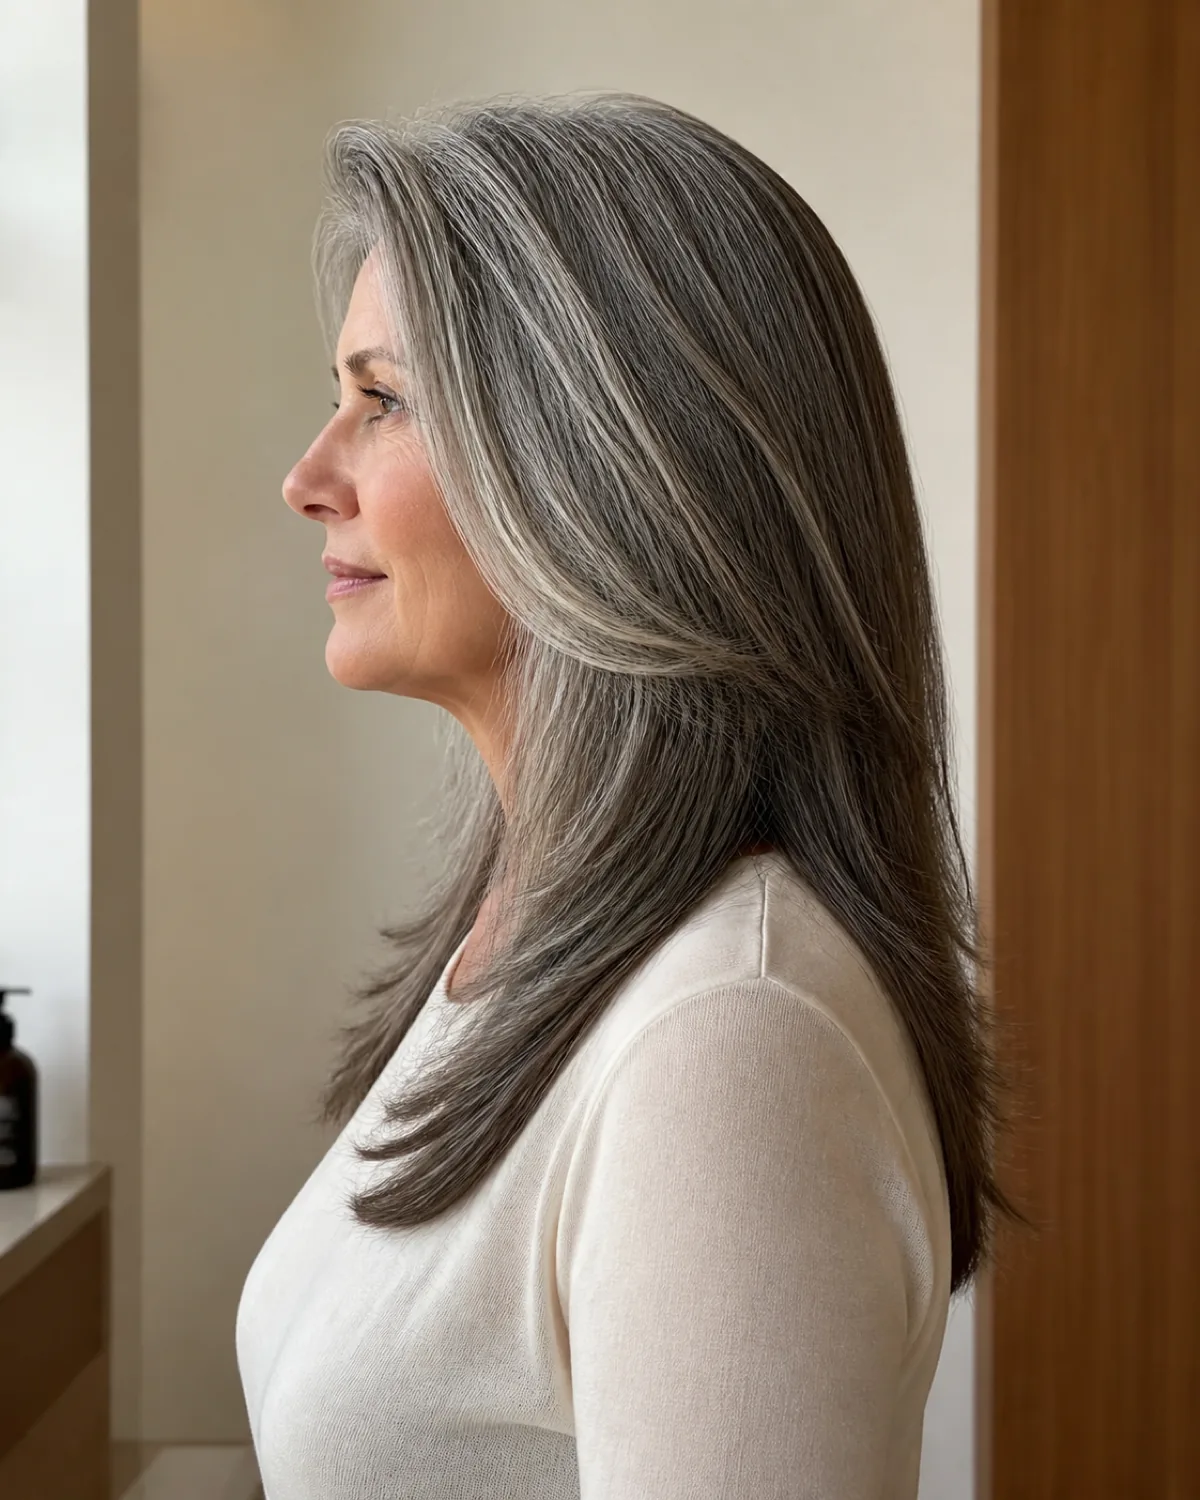
Even stepped layers distribute weight removal across the full length. Each layer sits about two inches below the one above it, creating a predictable rhythm that removes bulk gradually rather than all at once. The profile silhouette shows the stepping clearly.
This is the most controlled approach to thinning out thick long hair. It does less than a shag but more than a single-length cut, and the regularity means fewer surprises when it grows out.
- Ask your stylist how far apart the layers should sit. Two inches is standard, but denser hair may need them closer
- Confirm whether the stepping should start at the chin or lower
- Ask how this grows out, because even layers tend to blend into each other over time, which can be an advantage
- Note that stepped layers are easier to maintain than a shag but give less movement
6. U-Shaped Perimeter With Minimal Internal Layering
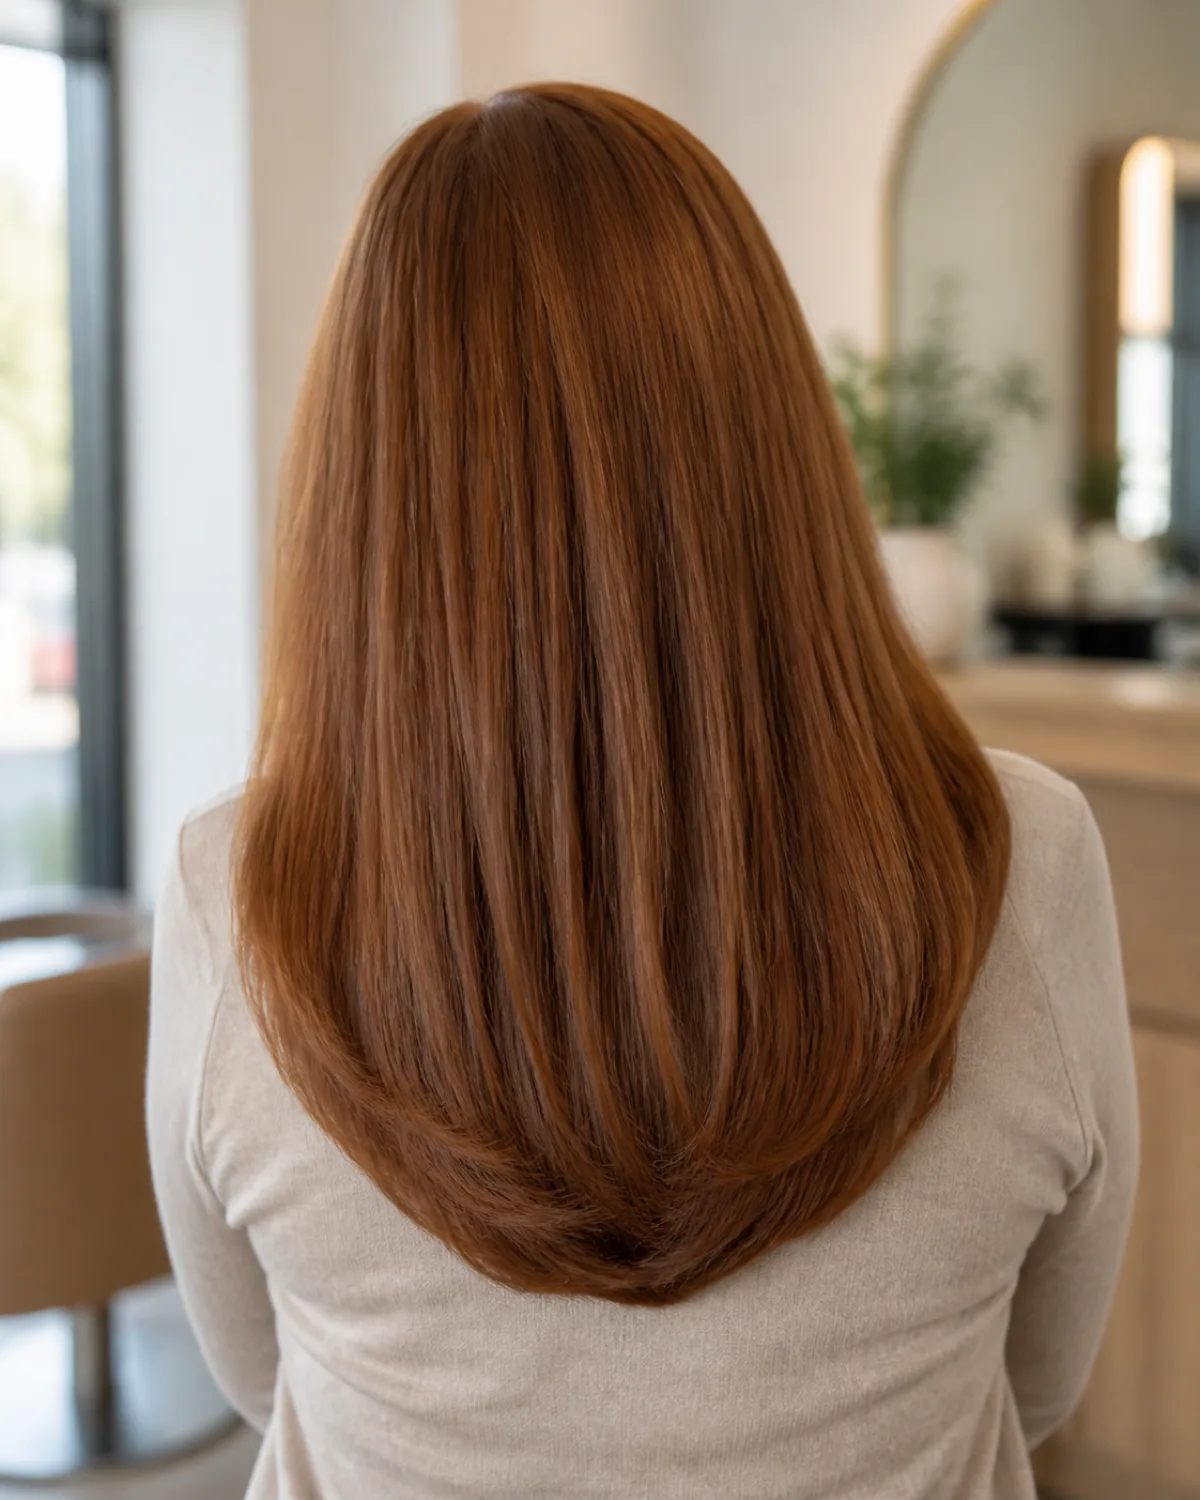
The U-shaped perimeter curves upward from the longest center point, and the interior stays mostly unlayered. This preserves the thick-hair advantage: natural density at the ends that reads as healthy fullness. The U-shape itself provides the only shaping.
This suits women whose bulk problem is width at the sides rather than overall heaviness. The U-cut narrows the sides while keeping the back long and full. If the problem is weight through the entire back, this will not do enough.
- Ask your stylist whether your bulk is at the sides or through the back, because this cut only addresses the sides
- Confirm how deep the U-curve should go to narrow your silhouette without looking like a mullet
- Ask whether you need any internal thinning at all, or if the U-perimeter alone handles the shape
- Understand this is a minimal intervention. If you want visible layers, this is not the cut
7. Long Feathered Layers From the Cheekbone
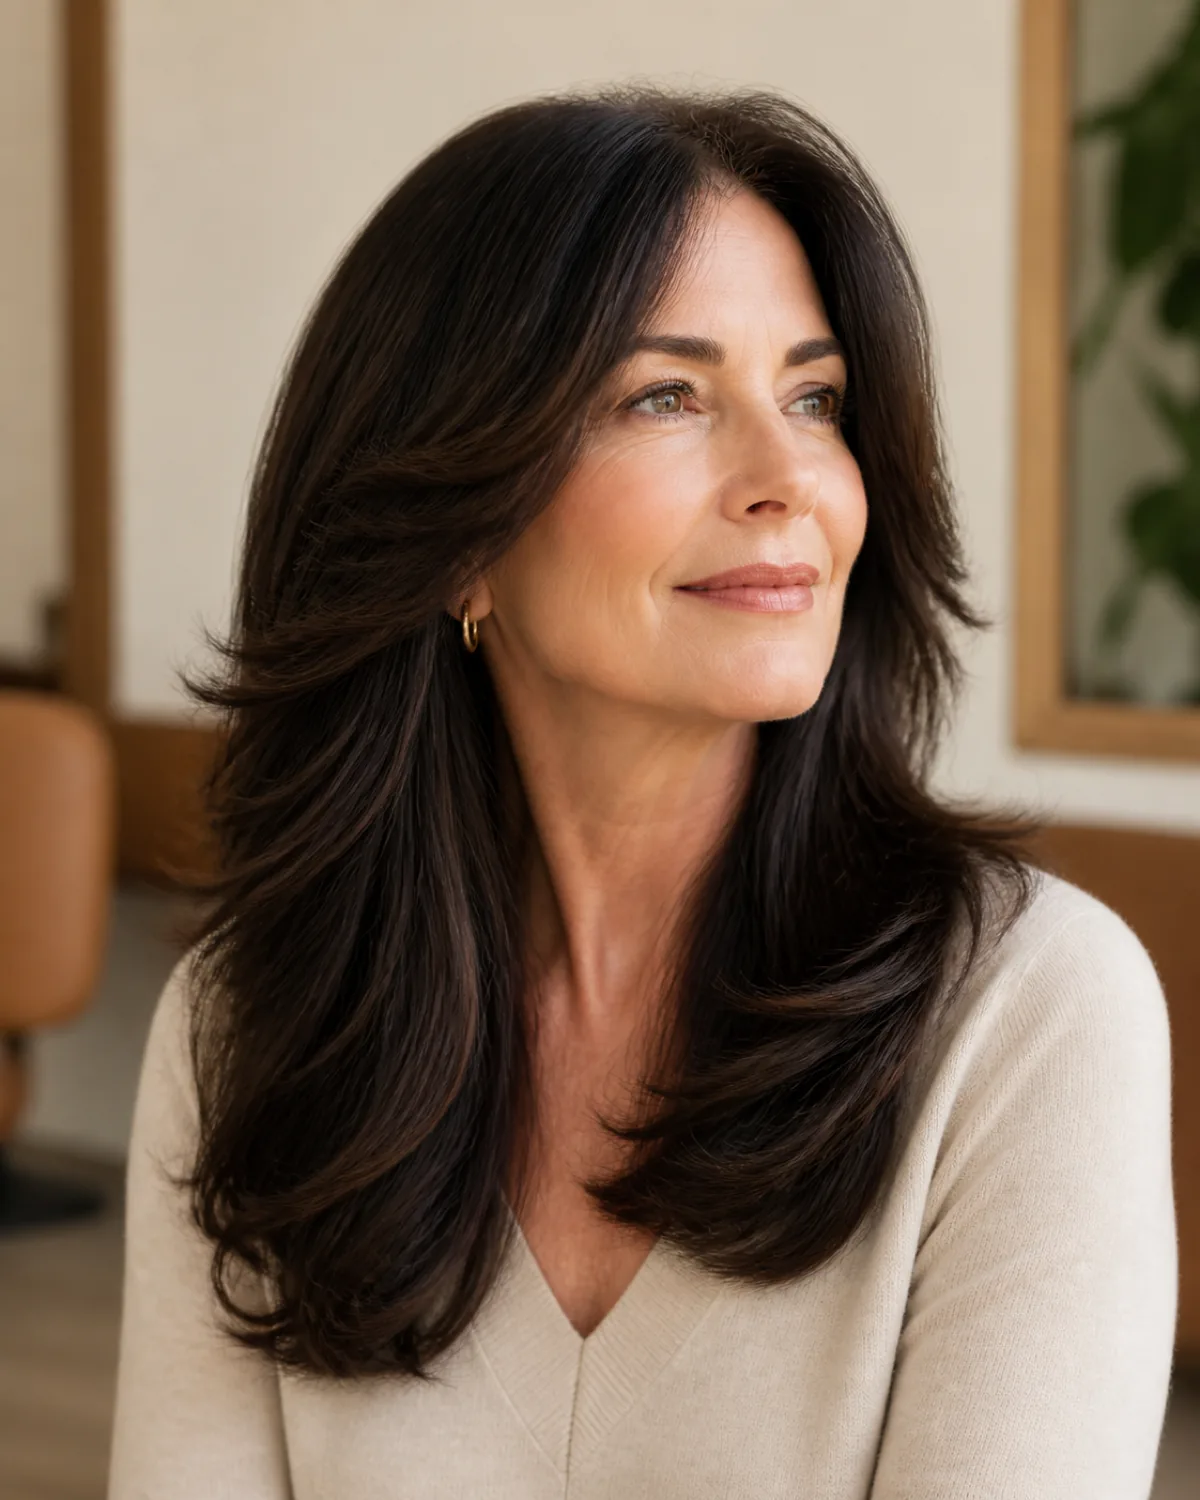
Feathered layers taper the ends rather than cutting them blunt, and starting at the cheekbone puts the lightest, softest pieces right where a strong jawline meets the ear. On thick hair with adequate strand diameter, the feathered ends hold their shape. On thick hair with fine individual strands, they can go stringy within weeks.
The judgment is strand diameter, not overall density. You can have a lot of hair where each strand is fine, and feathering will thin those ends past the point of looking intentional.
- Ask your stylist to check your strand diameter, not just your density, because they are different measurements
- Confirm whether the feathering should start at the cheekbone or the jaw
- Ask how quickly feathered ends lose their taper on your hair type
- Bring a photo of your ends at six weeks past a cut. If they already look thin, feathering will make it worse
8. One-Length Blunt Cut With Invisible Thinning
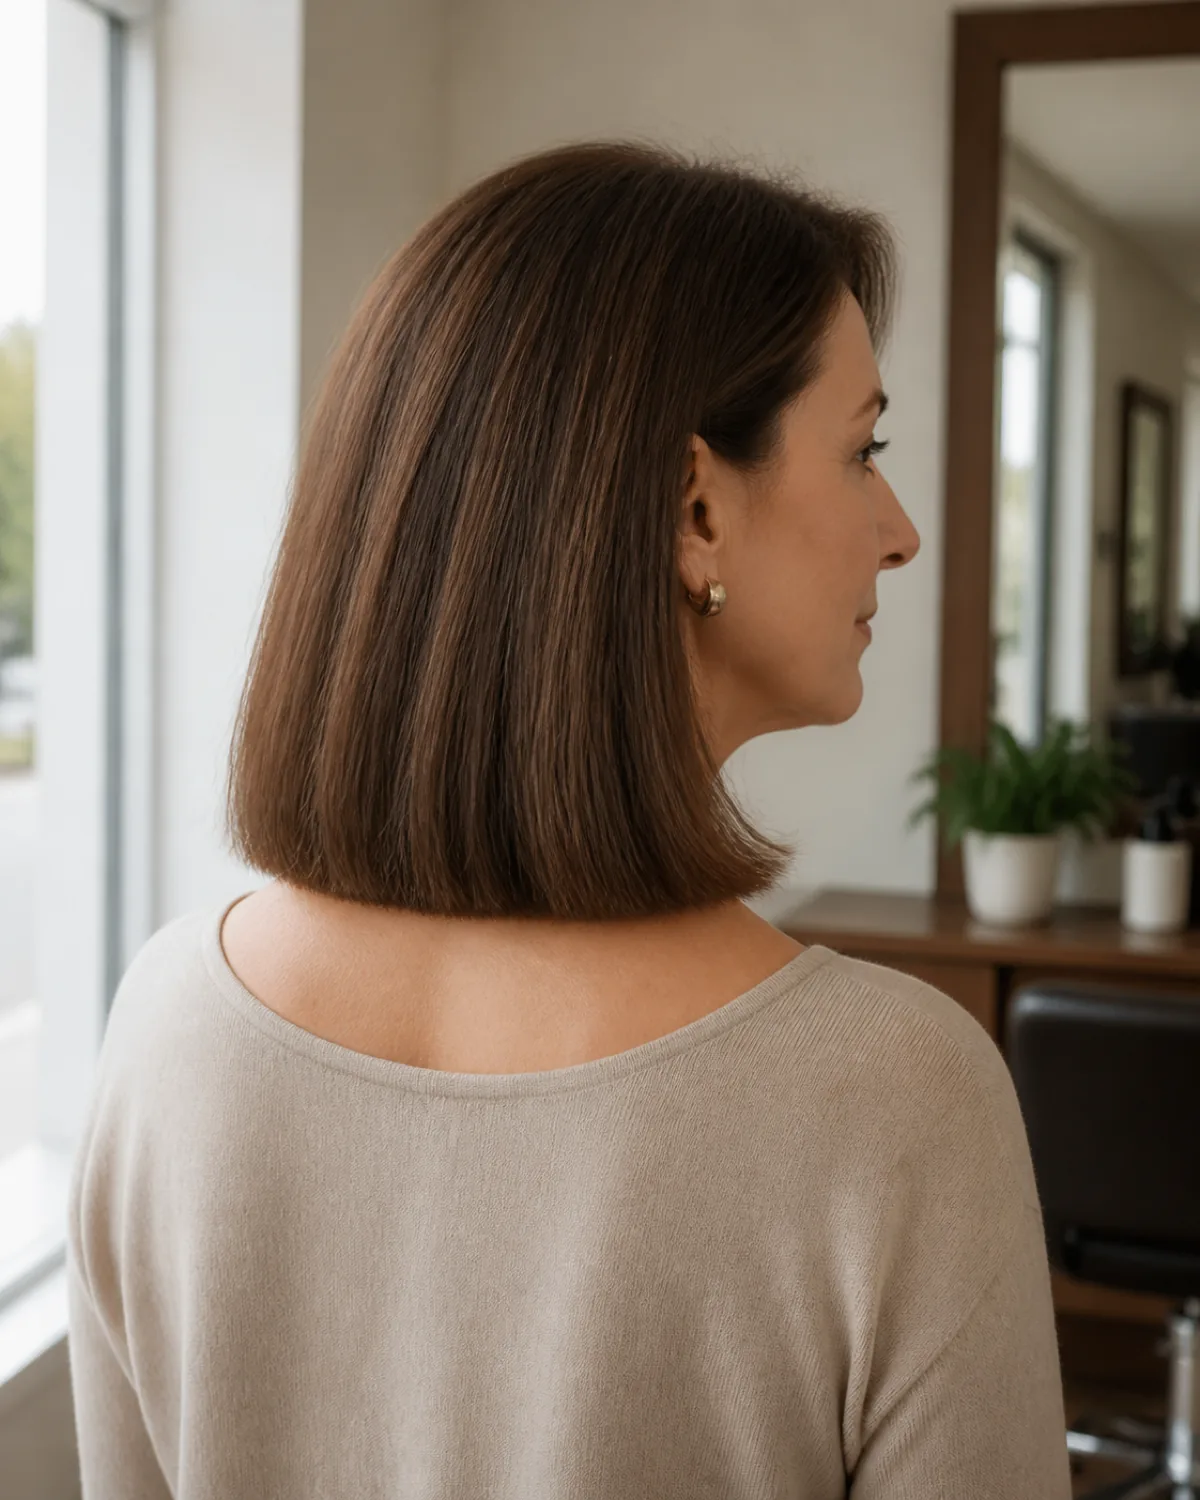
When layers are not the answer, internal thinning removes weight without changing the visible outline. The perimeter stays blunt and horizontal, and the hair moves naturally because bulk has been taken out through the interior where nobody sees it.
This is for women who love their silhouette and hate the heaviness. The stylist uses thinning shears or point cutting through the mid-lengths, leaving the surface layers intact. The result looks the same but feels lighter.
- Ask your stylist to thin internally without changing the outline, and confirm they will use thinning shears or point cutting through the interior
- Confirm that the blunt perimeter will stay sharp after thinning, because some hair types show the thinning at the ends
- Ask how much weight they plan to remove, because too much internal thinning can make thick hair look patchy
- Understand that this needs refreshing more often than visible layers because you cannot see when the bulk returns
9. Long Layers With a Deep Side Part
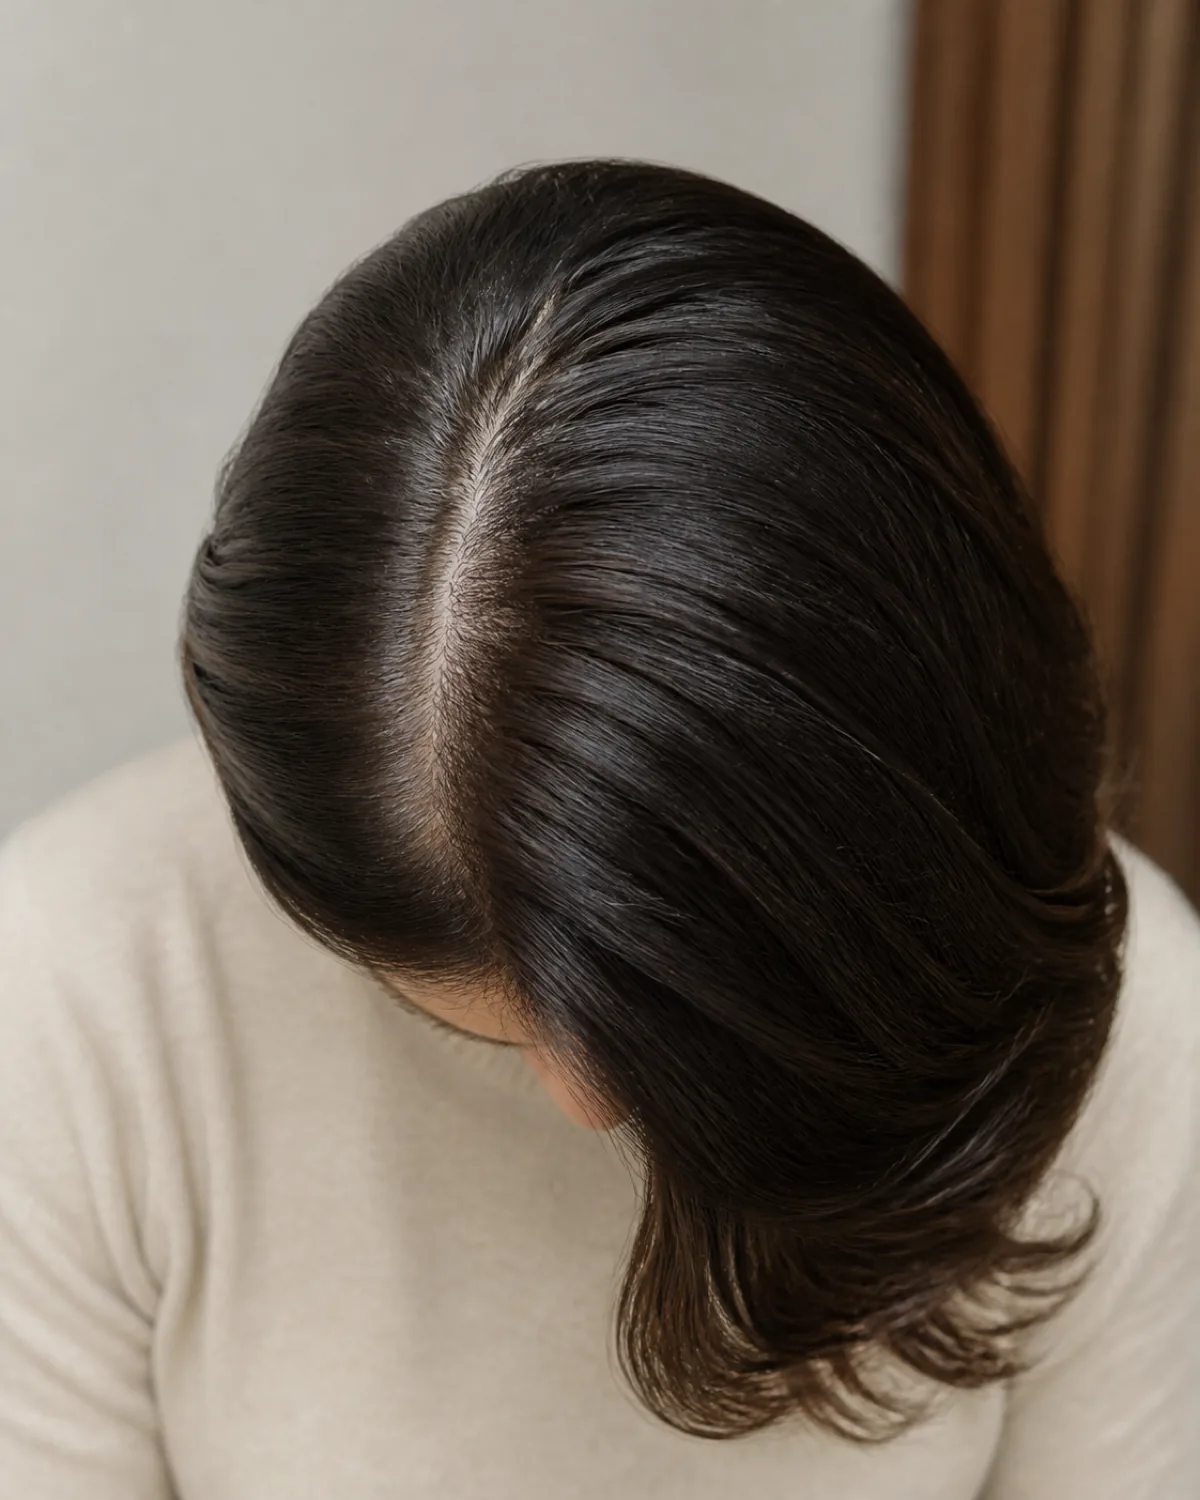
A deep side part shifts the volume triangle off-center without adding or removing a single layer. The heavier side carries more hair and reads as deliberately full. The thinner side lies closer to the head and narrows the overall silhouette.
On thick hair, this works because you have enough density to make the asymmetry visible. On thin hair, a deep side part can expose the scalp on the shallow side. Thick hair fills both sides even when the split is uneven.
- Ask your stylist which side should carry the heavier section, usually the side that flatters your face shape
- Confirm whether the layers should be cut to match the deep part or a center part — cutting for both gives you options
- Ask whether the deep part suits your cowlick, because fighting a natural parting means daily restyling
- Try parting your hair on the opposite side at home for a week before committing at the salon
10. Collarbone-Length Transitional Layers
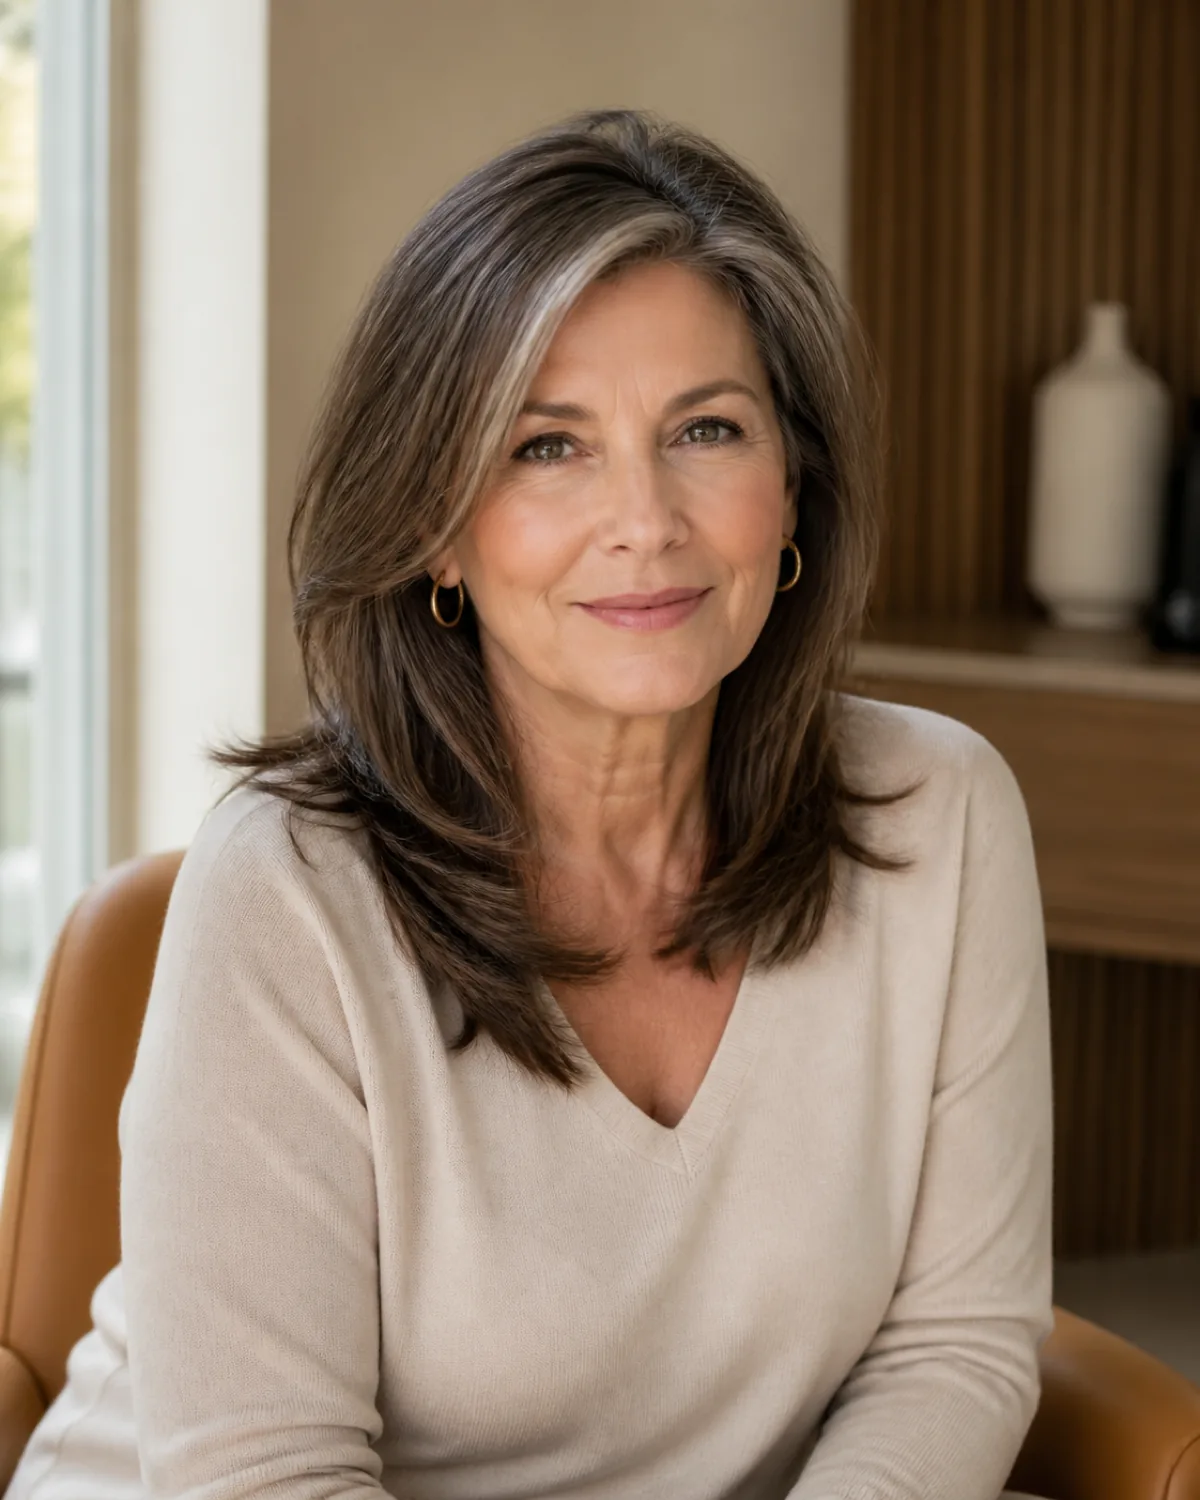
This is the entry point when thick waist-length hair needs its first real structure. The cut brings everything to the collarbone and adds layers from the chin down. It is still long enough to pull back, still long enough to feel like long hair, but now the weight sits where the layers can manage it.
The transition is psychological as much as structural. Losing six or more inches of thick hair changes how your head feels on your neck, and some women are not ready for that. The question to answer before booking is whether you want structure more than you want length.
- Ask your stylist to cut dry so you can see the length in real time rather than being surprised when it dries shorter
- Confirm whether chin-to-collarbone layers are enough or whether you need layers starting higher
- Ask what the shortest workable length is for your density, since some thick hair needs the collarbone, not the chin
- Bring a photo of a ponytail. If you wear one daily, confirm the new length still reaches the elastic
11. Long Razor-Cut Layers for Natural Movement
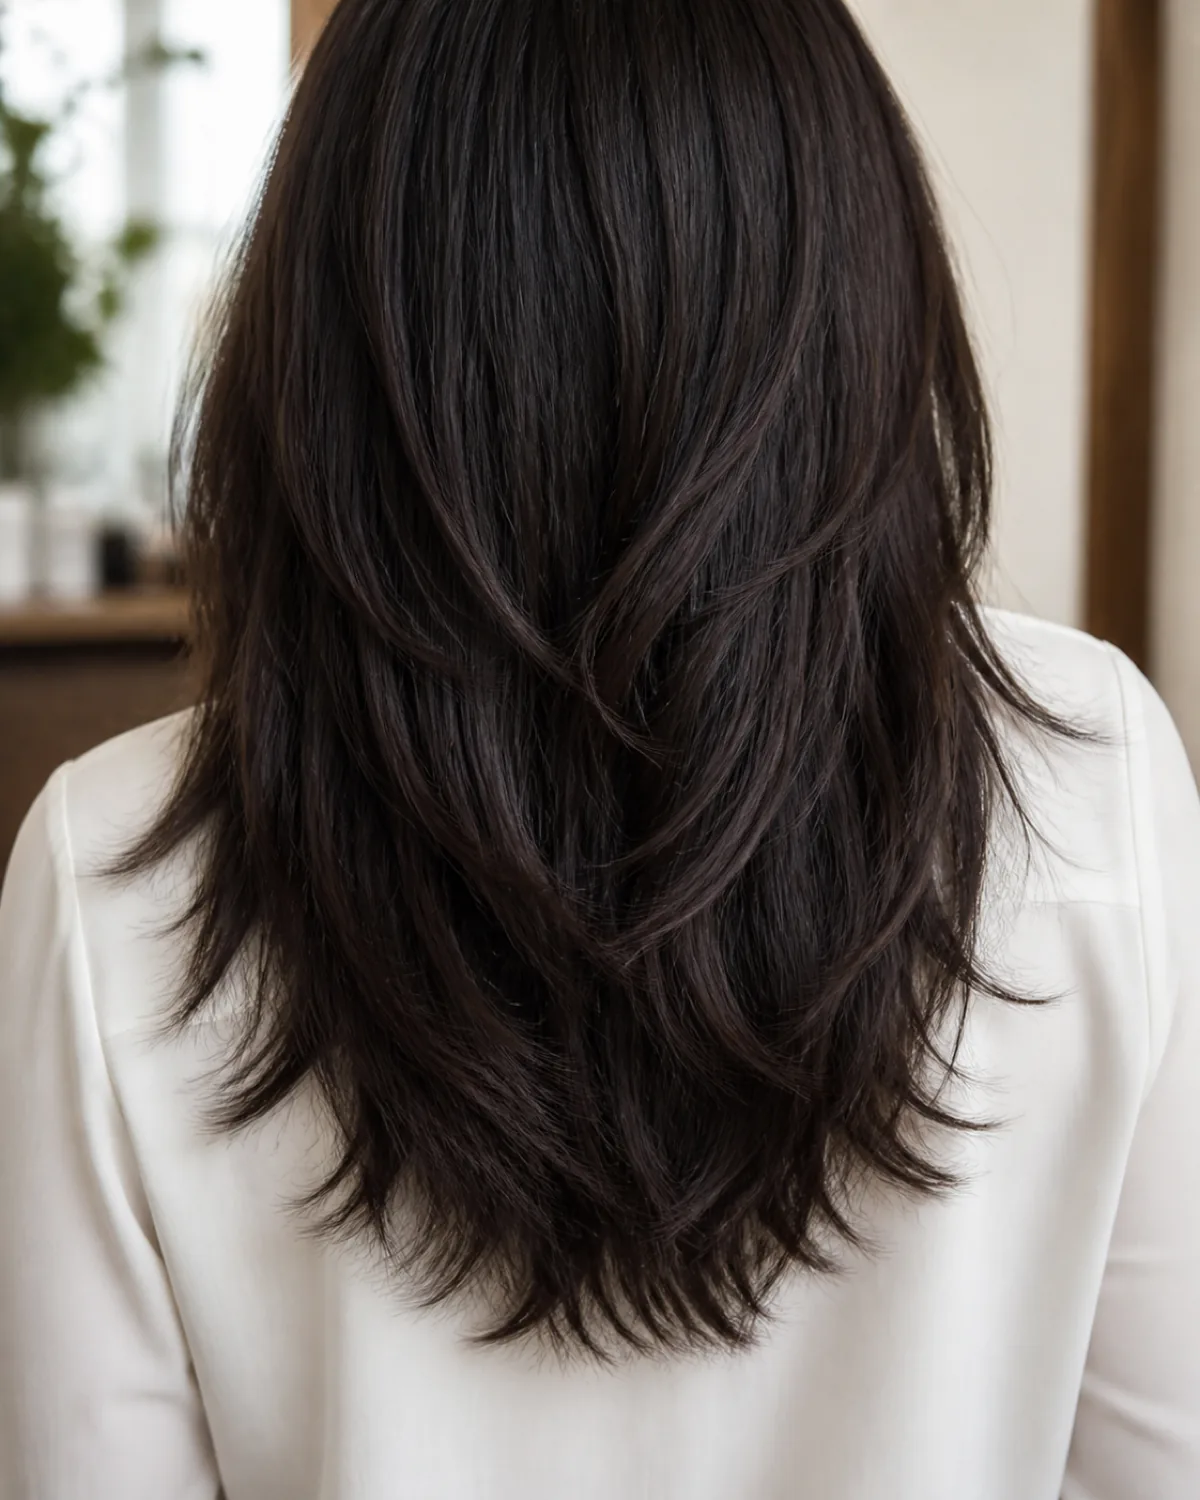
A razor removes more bulk per pass than shears because it slides through the hair at an angle rather than cutting straight across. The result is ends that are textured, slightly irregular, and move on their own. On thick coarse hair, this creates the swing that shear-cut layers cannot match.
The restriction is strand diameter. Razor cutting on fine-diameter strands — even when there are a lot of them — can shred the ends past the point of looking healthy. This technique is for hair that is both thick in volume and thick in individual strand width.
- Ask your stylist whether your strand diameter is thick enough for a razor, and they should be able to tell by feel
- Confirm whether the razor will be used throughout or only on the ends, because full-length razor cutting removes the most bulk
- Ask how quickly razor-cut ends grow out compared to shear-cut ends on your hair type
- Understand that razor-cut hair tends to look more undone. If you prefer a polished finish, shears may suit you better
12. Layered Long Hair With a Hidden Undercut

An undercut removes a section of hair at the nape, and the long top layer falls over it. Nobody sees it when the hair is down. The reduction in bulk is immediate and invisible, and on very dense thick hair, it can be the only way to bring the weight down to a manageable level without changing the visible shape.
This is the most aggressive bulk-removal option here, and the one that is hardest to reverse. Growing out an undercut takes months, and the growing-in phase has a noticeable bump where the short section meets the long. The question is whether your density truly requires this level of intervention.
- Ask your stylist how wide the undercut section should be for your density, because too wide and it shows when the wind blows
- Confirm how short the undercut needs to be to make a real difference — a clipper guard 2 or 3 is standard
- Ask how long the growing-out phase takes and whether you can handle the bump as it comes in
- Try clipping the section up and looking in the mirror to preview the volume reduction before committing
13. Waist-Length With Point-Cut Ends Only
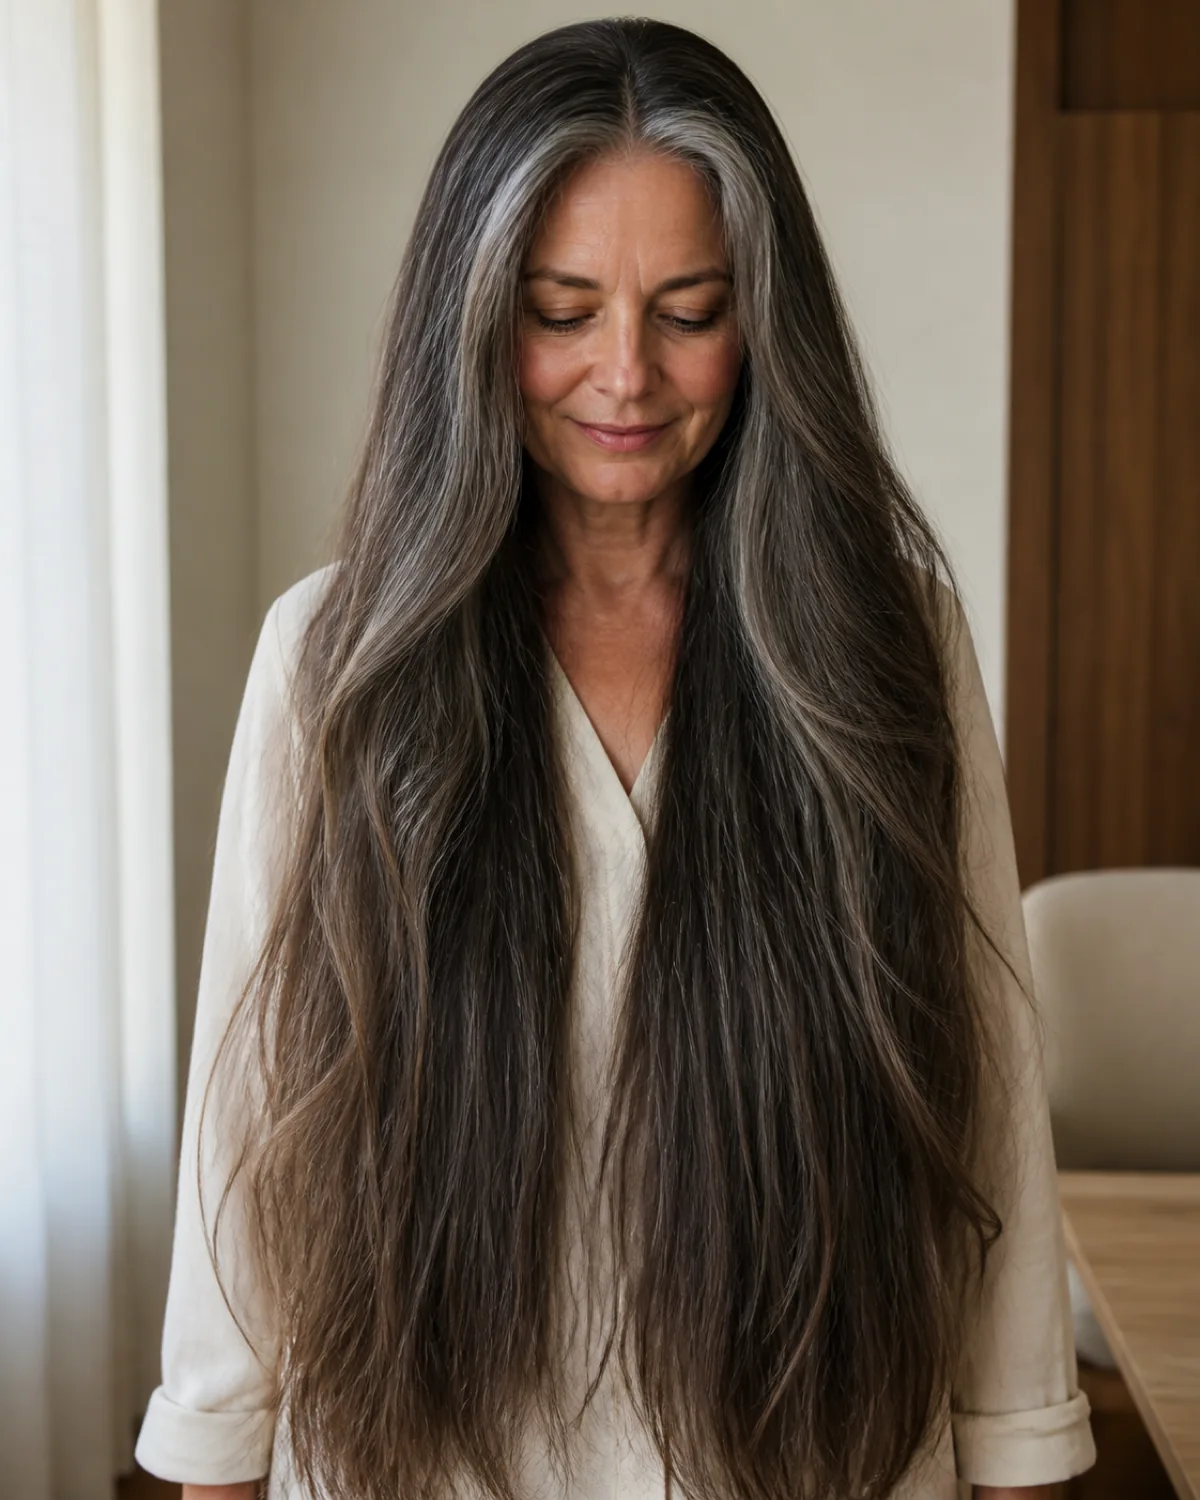
For women whose thick long hair is the piece they will not give up, point cutting offers the minimum effective intervention. The stylist cuts into the ends at an angle rather than straight across, softening the perimeter without removing mass from the interior. The overall density stays intact.
The question is whether point cutting alone handles your bulk. If the weight is concentrated in the mid-lengths and the back, softening the ends will not address it. But if the issue is a blunt, heavy perimeter that looks like a wall, point cutting opens it up without losing length.
- Ask your stylist whether point cutting alone will address your bulk or whether you also need internal thinning
- Confirm how much length point cutting removes — it should be minimal, under an inch
- Ask how often you need a trim to maintain the softened ends — point-cut edges can start looking ragged faster than blunt ones
- Understand that this is the least dramatic option — if you want visible movement, you will likely need layers higher up
A stylist who can see your hair in person outranks anything written here. Bring two photos, not ten, and ask them to show you where your weight sits before the scissors come out.
Where the checkable claims come from
- How to Layer Long Hair: Techniques for Cutting Layers — Sam Villa
- Hair Cutting Techniques: One Length, Graduated, Layered — Pivot Point International
Keep this one
Save it for the appointment
Pin the image above to the board you actually open before a salon visit. This guide is written to be re-read, not read once.
Tonight, before you close this tab
- Section your dry hair at the crown, sides, and back and note which section feels heaviest — that is what you tell the stylist
- Hold your hair at chin length in the mirror and decide whether you would cut to there — your answer sets the shortest layer boundary
- Write down whether your bulk is at the sides, the back, or everywhere — the answer points to different ideas in this guide
- Look at photos of your hair on a humid day — if it expands sideways, face-framing and side-part strategies matter more