16 Natural Curly Hairstyles for Women Over 50 That Work With the Curl, Not Against It
Sixteen natural curly hairstyles for women over 50, from shoulder to mid-back. Each cut judged by whether it works with the curl or fights it.
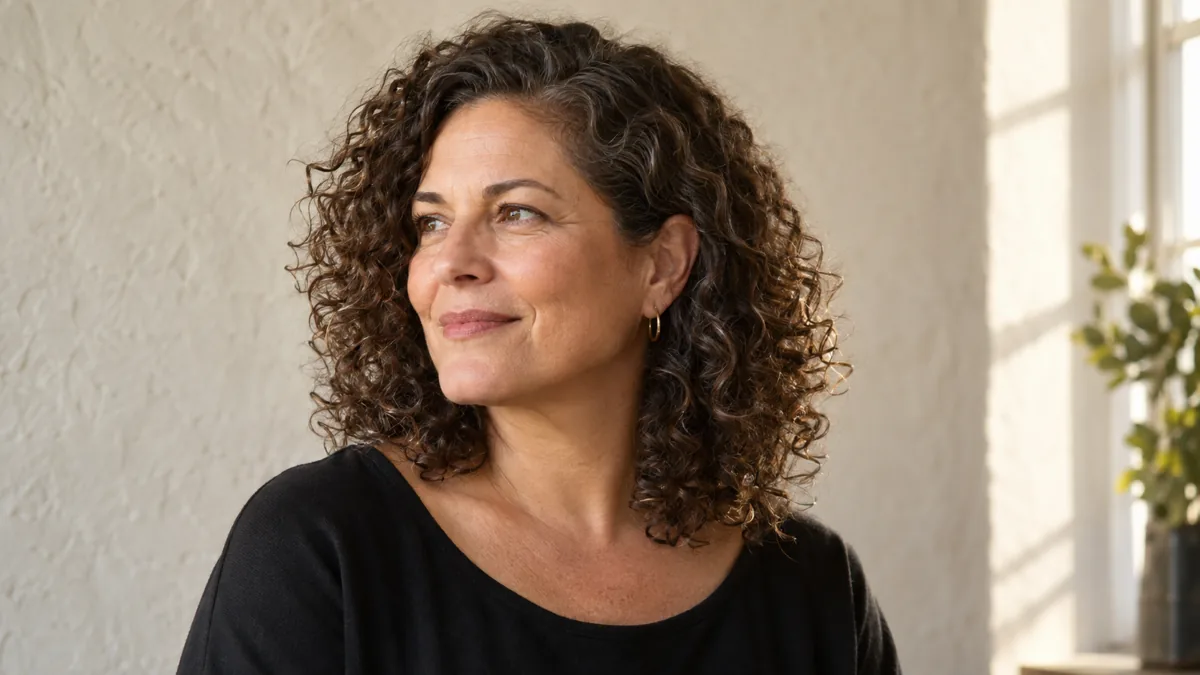
Booking an appointment soon? Save this page. It is easier to skim in the chair than to remember.
At a glance
Works
- A shoulder-length curly shag on thick hair because the disconnected layers remove interior bulk without flattening the curl pattern
- Long layers with face-framing pieces on medium-thick curls because they lighten the front without disrupting the back
- A nape undercut on dense curls because it removes bulk and heat without changing the visible silhouette
Depends
- A collarbone lob only if curl density holds a clean blunt hemline without gaps showing through
- Blunt bangs on long curls only if the curl pattern stays consistent at the hairline rather than going straight at the temples
- A V-cut only if hair is thick enough that the tapered sides do not thin the silhouette into a narrow column
Skip
- Disconnected shag layers on fine low-density curls because they create gaps instead of texture
- Long heavy curls with no layers if you want crown volume because the weight pulls it flat
- A rounded one-length shoulder cut on very tight curls because the contained shape reads helmet-like
Natural curly hair at medium-to-long length faces different physics than short curly hair. Weight stretches the pattern, gravity pulls volume down, and shrinkage means the cut reads shorter than what the stylist measures wet.
These sixteen cuts answer one question: does the shape let the curl do the work, or does it fight the curl into something the hair cannot hold? Each idea lands on who it suits, who should skip it, and what to say in the chair.
A stylist who can see your curl pattern in person outranks anything written here. Bring three photos and your shrinkage number.
1. Shoulder-Length Curly Shag With Curtain Bangs
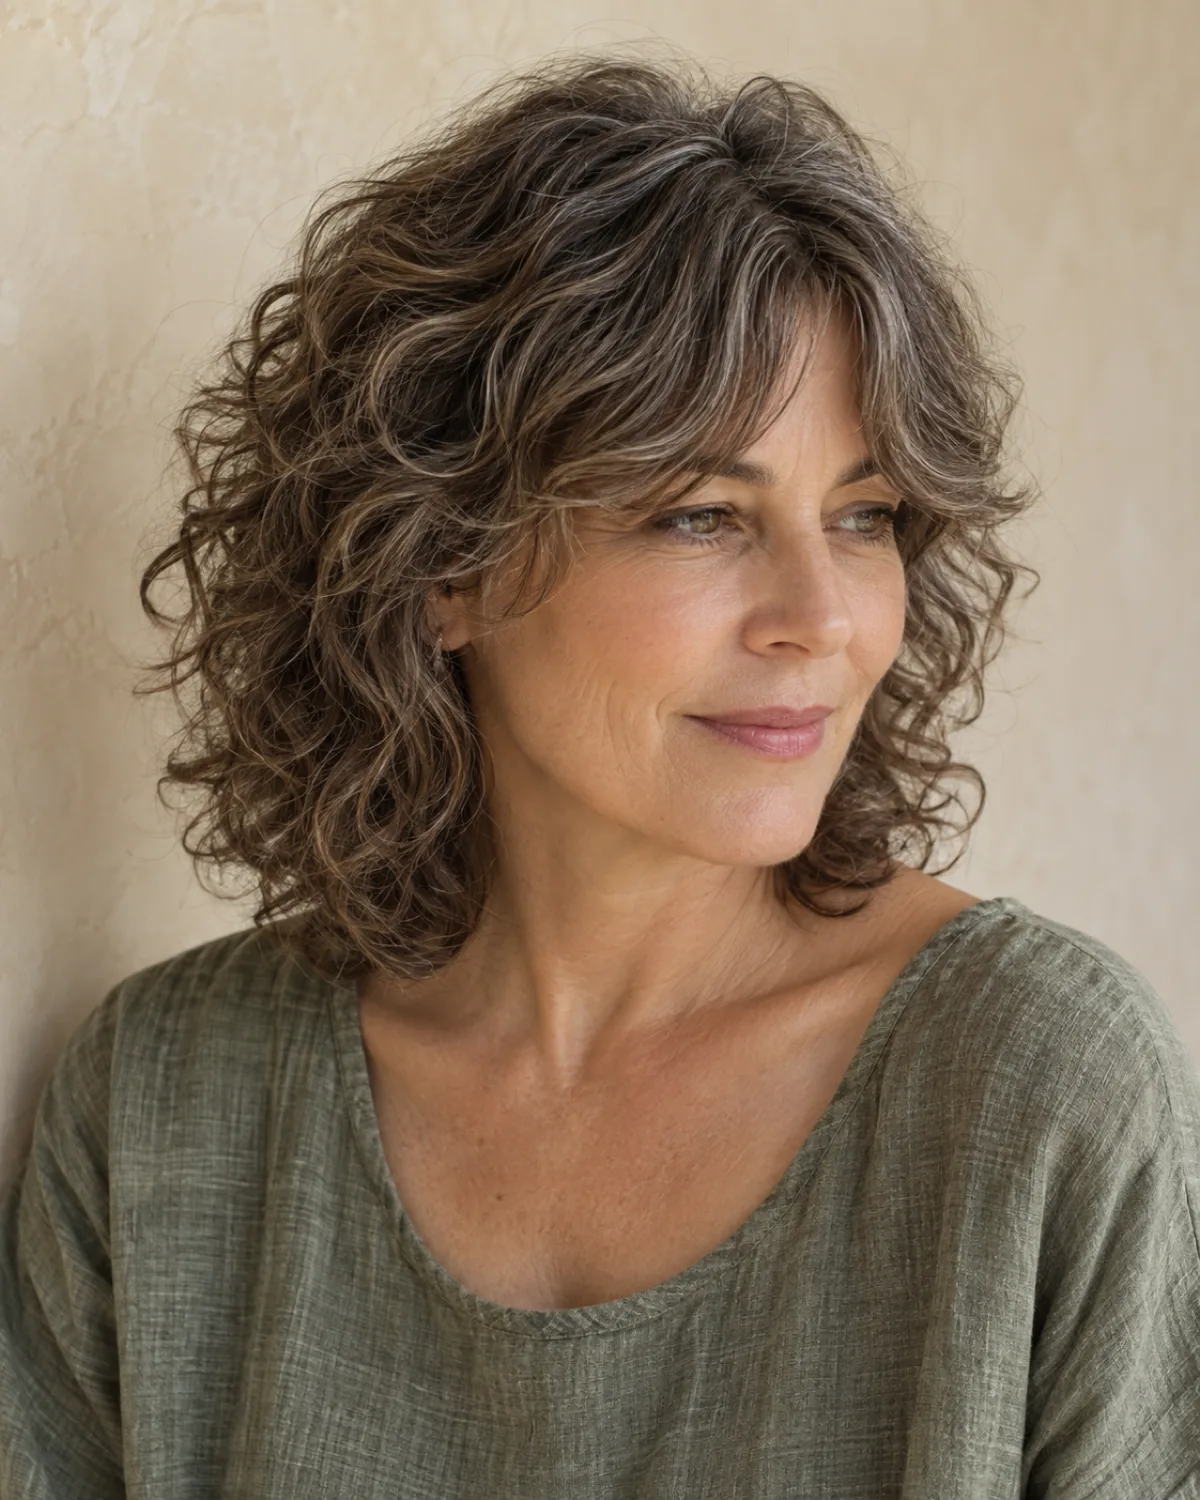
The disconnected layers starting at the cheekbone remove interior bulk while keeping perimeter length, which is how thick natural curls hold a shape without puffing into a triangle. The curtain bangs part at center and frame the face without hiding it. Skip if curls are fine and low-density because disconnected layers on thin curls create gaps rather than texture.
- Ask the stylist to cut dry and keep the heaviest layer at the collarbone so the weight anchors the shape
- Request the curtain bangs twenty percent longer than you think you want because curl shrinkage will pull them up
- Check that both sides of the bangs frame the face evenly rather than bunching to one side
- If you are considering bangs after fifty this shag gives you a safe structure to test them within
2. Long Layered Curls With Face-Framing Pieces
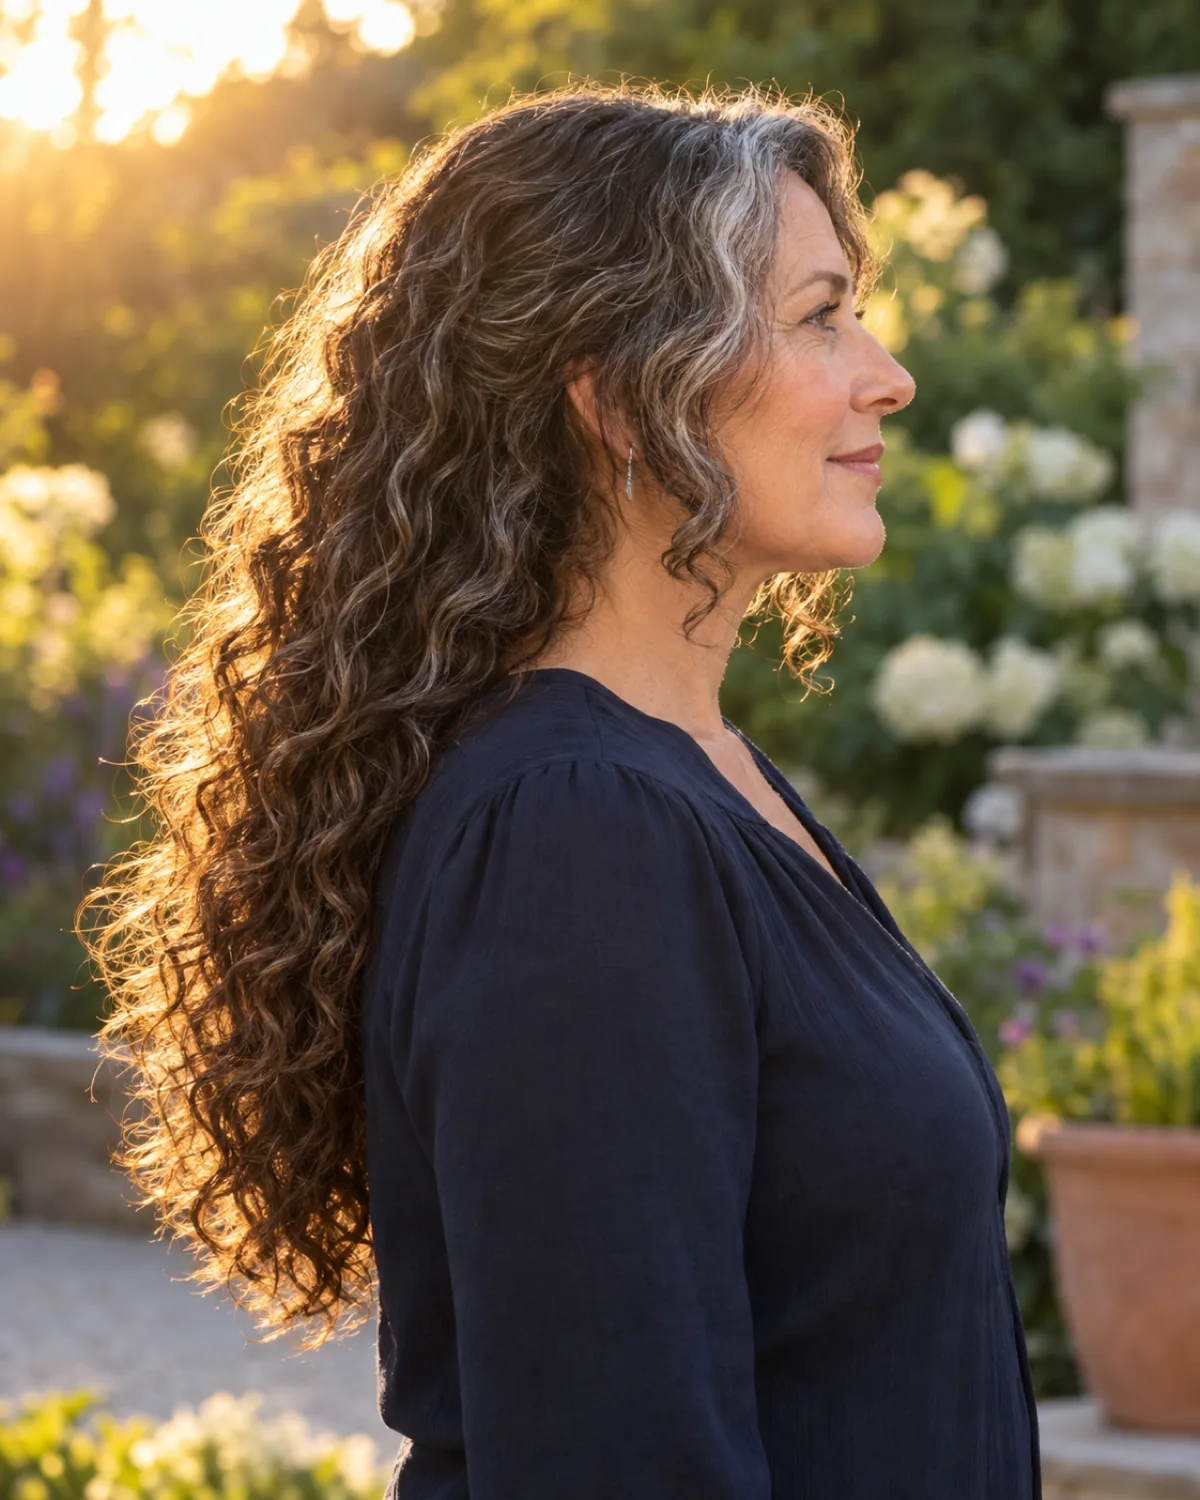
The face-framing pieces lighten the front without disrupting the curl pattern at the back. Shorter layers starting at the chin create movement where the eye rests while the back stays heavy enough to hold its shape. Works on medium-to-thick curls. Skip if hair is fine because the front layers thin an already sparse frame.
- Tell the stylist the face-framing layers start at the chin and do not go shorter because above the chin they flip rather than fall
- Ask for a dry cut so each layer is evaluated at its natural spring length
- Expect the face-framing pieces to need trimming every six to eight weeks while the back length can go ten to twelve
- This pairs well with a shoulder-length approach if you want the framing effect at a shorter length
3. Collarbone Lob on Natural Curls
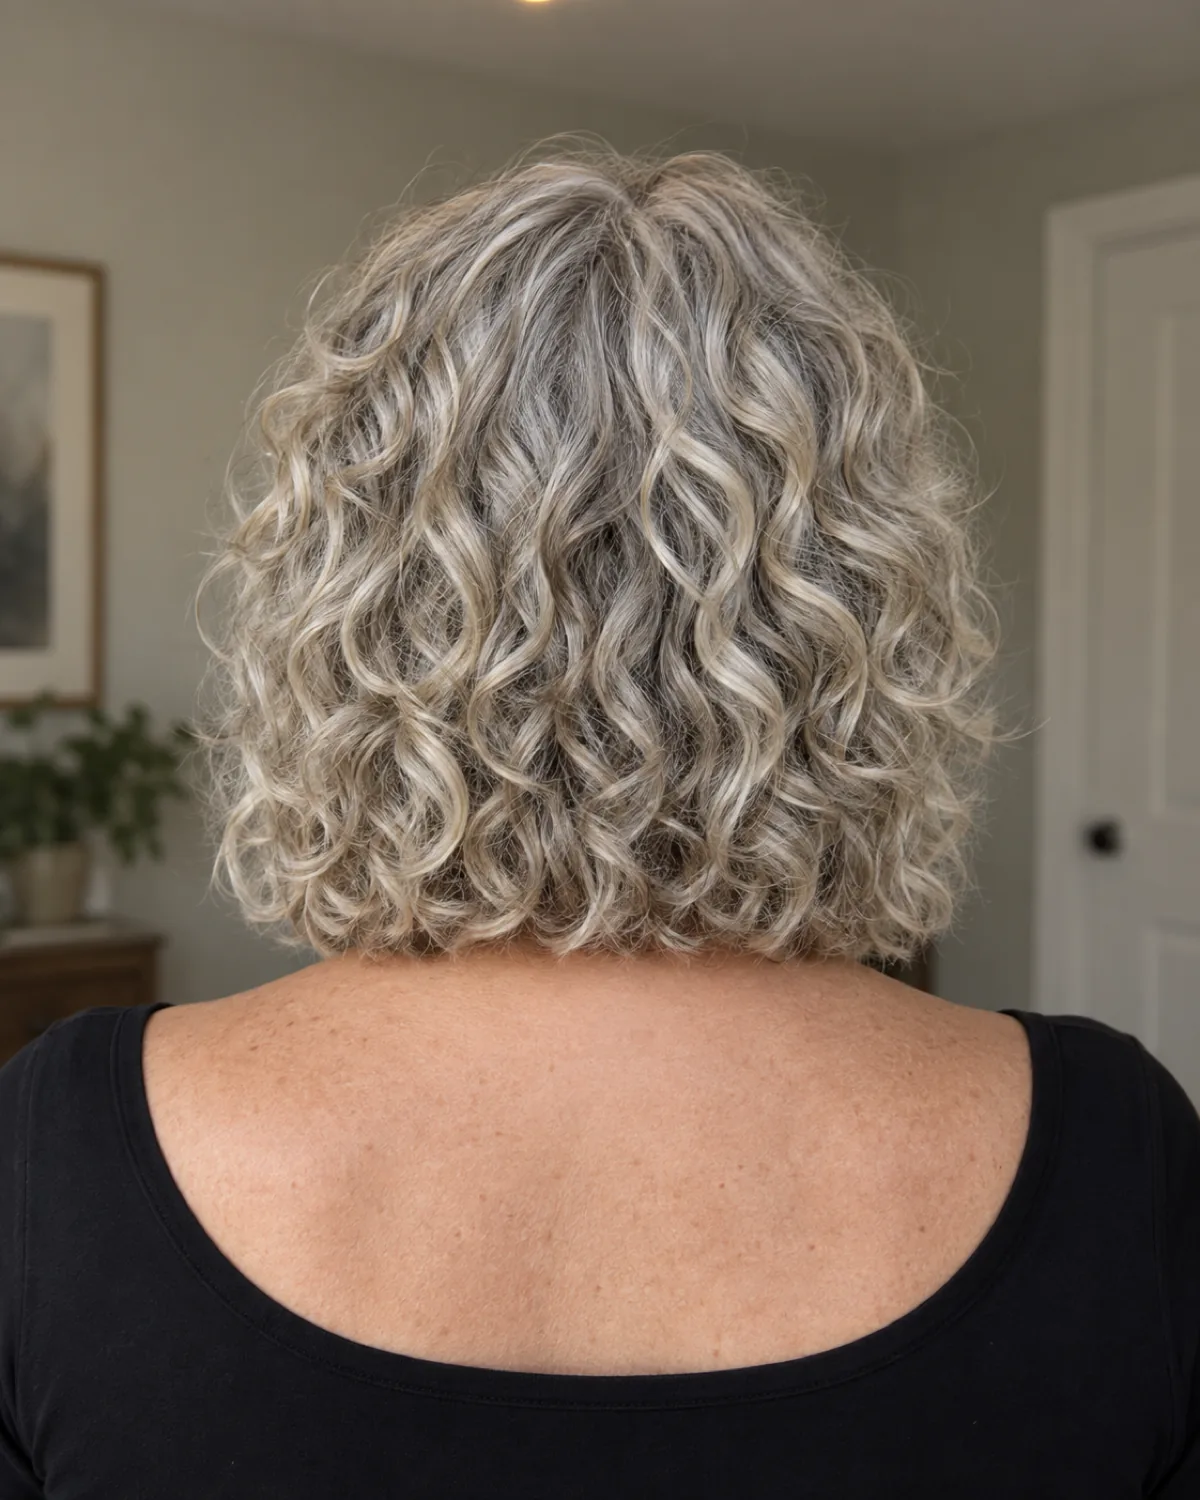
The blunt hemline is the point. All the curls end at the same level, which reads deliberate and low-maintenance. This works when curl density is high enough to hold that clean line when dry. One cut, no layers, and the curl does the rest. Skip if your curls separate at the ends and show gaps because the blunt line magnifies them instead of hiding them.
- Tell the stylist you want a blunt perimeter with no texturizing because texturizing removes the density the lob depends on
- Ask for the cut at collarbone length wet, then check where it lands dry, because shrinkage may pull it to chin level on tight curls
- This is the lowest-maintenance option on this list so measure your daily styling minutes before choosing something with more layers
- If the blunt hemline shows gaps, the tapered-ends option solves the same length at a friendlier finish
4. Curly Bob-to-Lob Grow-Out Shape
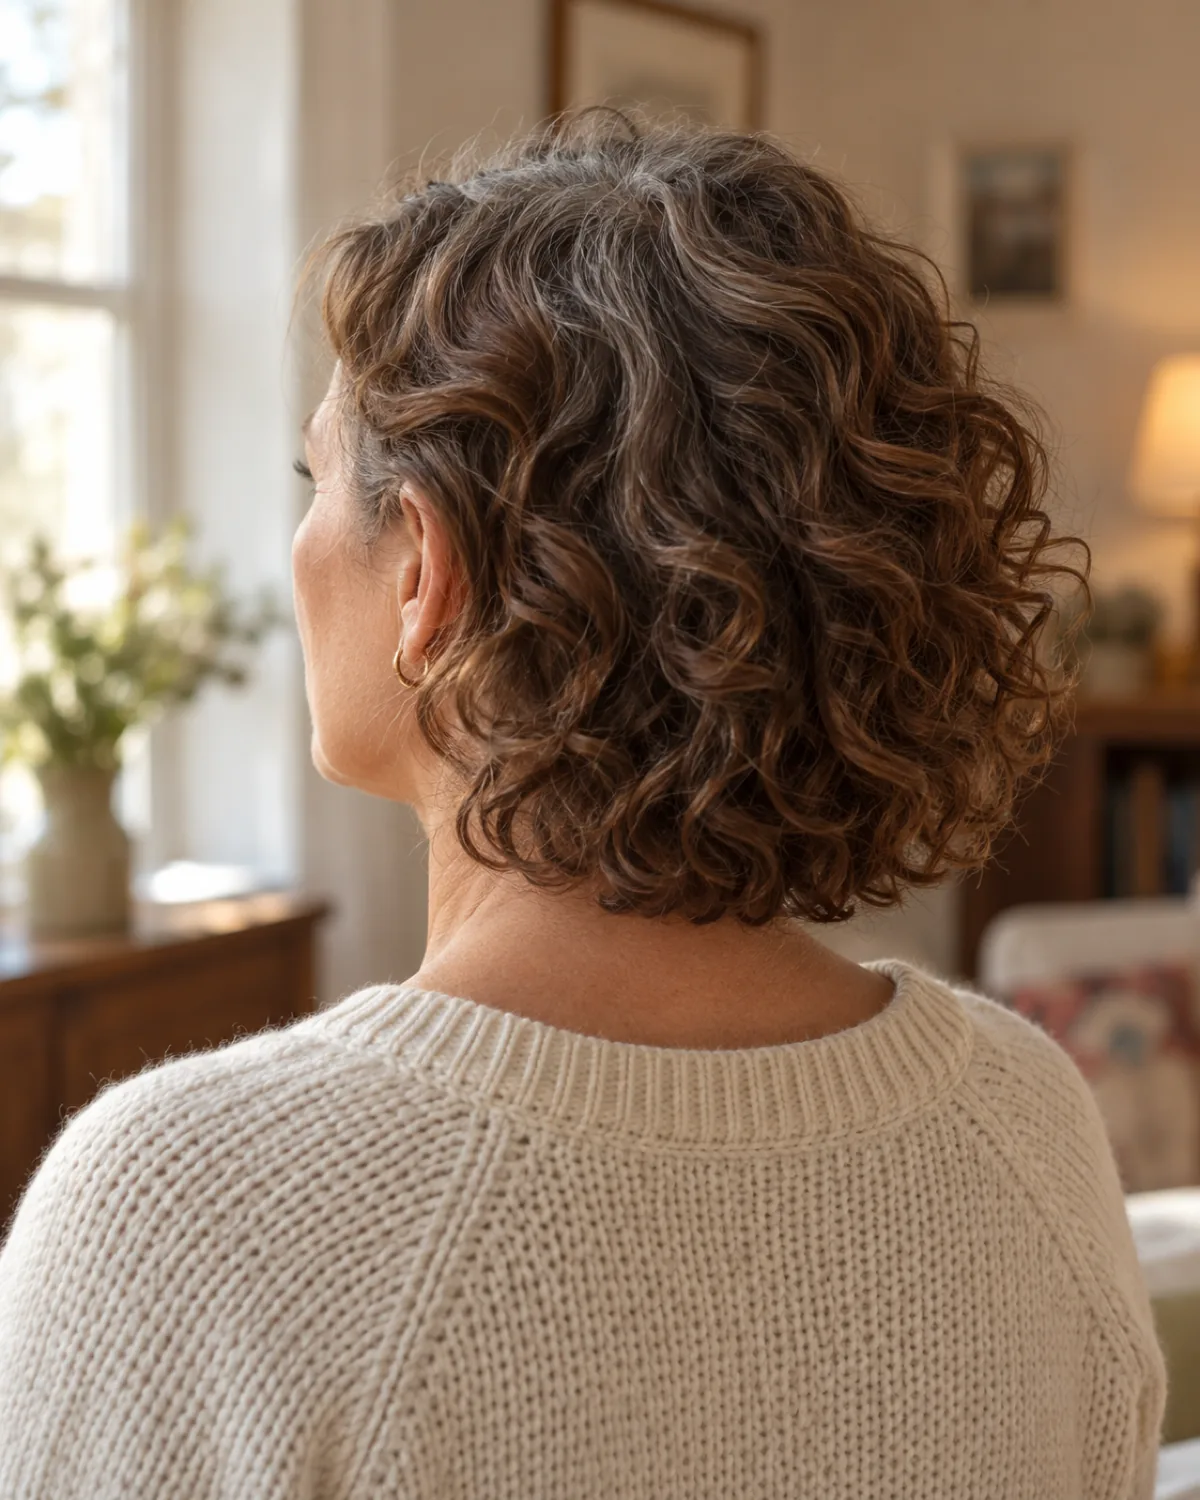
The awkward length between jaw and shoulder is where most curly-haired women give up and cut back short. A stylist can shape the grow-out by adding internal layers that let the curl pattern read coherently at this in-between stage. The nape tends to get heavy first, and managing that weight without losing progress is the whole game. Depends on patience and a trim schedule every eight to ten weeks.
- Ask the stylist to remove weight at the nape without touching the perimeter length
- Accept that this stage will not photograph as well as the destination length and that the goal is getting through it
- Internal layers are different from surface layers: they are cut underneath to thin the bulk, not on top to create visible movement
- If you are growing out a short curly cut this is the stage you need a plan for rather than the one you skip
Where to start
Find your situation, skip ahead
Your natural curls are thick, medium-density, and you want to keep length at or below the shoulder without daily styling
A shoulder-length curly shag or long layers with face-framing pieces let gravity and the curl set the shape.
01 Shoulder-Length Curly Shag With Curtain Bangs02 Long Layered Curls With Face-Framing Pieces
Your curls are fine, losing density, and the ends separate by afternoon
A collarbone lob with blunt hemline or tapered ends, depending on whether your curls hold a clean line.
03 Collarbone Lob on Natural Curls15 Medium Curly Cut With Tapered Ends
You are growing out color and the silver roots are visible at two to three inches
A curly shag with silver streaks hides the demarcation line better than a one-length cut.
07 Curly Shag With Silver Streaks04 Curly Bob-to-Lob Grow-Out Shape
5. Medium-Length Natural Curls With a Deep Side Part
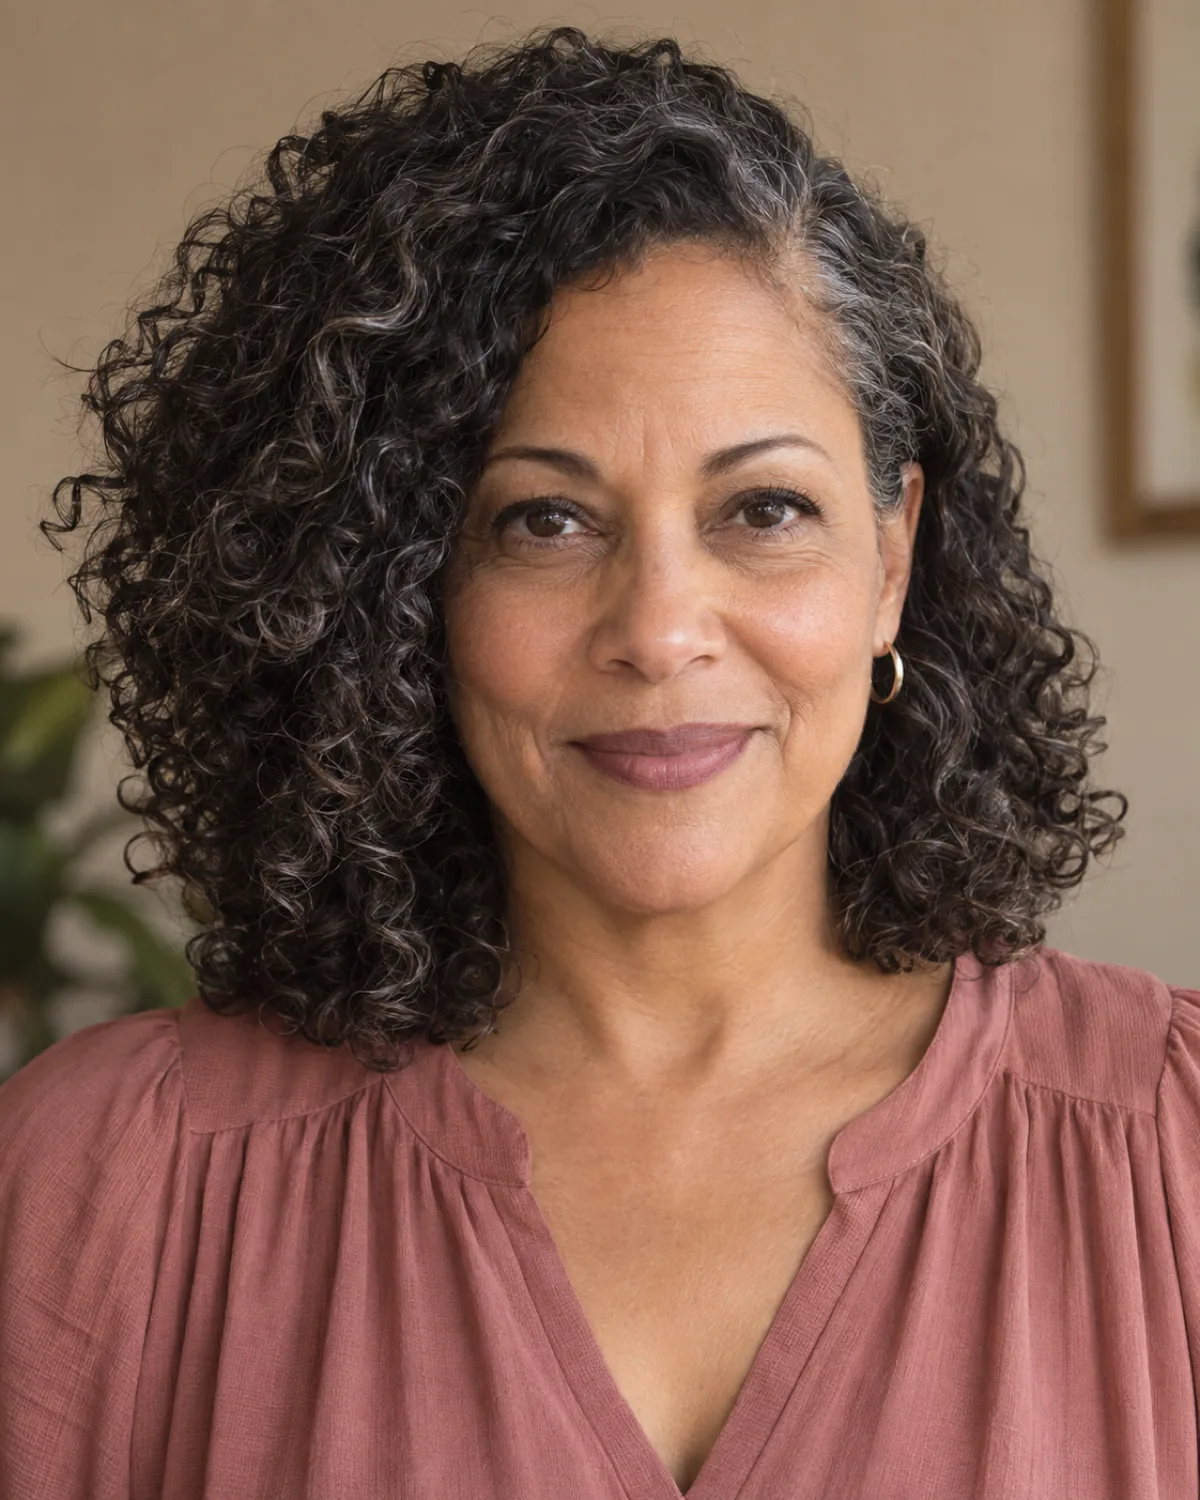
The deep side part shifts curl volume off-center. The heavy side carries the mass and the light side shows more scalp, which creates the illusion of lifted roots without any product. This flatters round and square faces by breaking the symmetry. Skip if your scalp is sensitive to sun because the wide part exposes it.
- Part the hair before the appointment and ask the stylist to cut around the part you actually wear rather than the one that appears when hair is wet
- Check that the heavy side has enough density to carry the asymmetric volume without going limp by midday
- If you normally part in the center, try a deep side part for a week before committing because the curl fall pattern changes and you need to see whether it settles
- The deeper the part the more scalp shows on the light side so find the depth that reads as a choice rather than as thinning
6. Layered Natural Curls Below the Shoulder
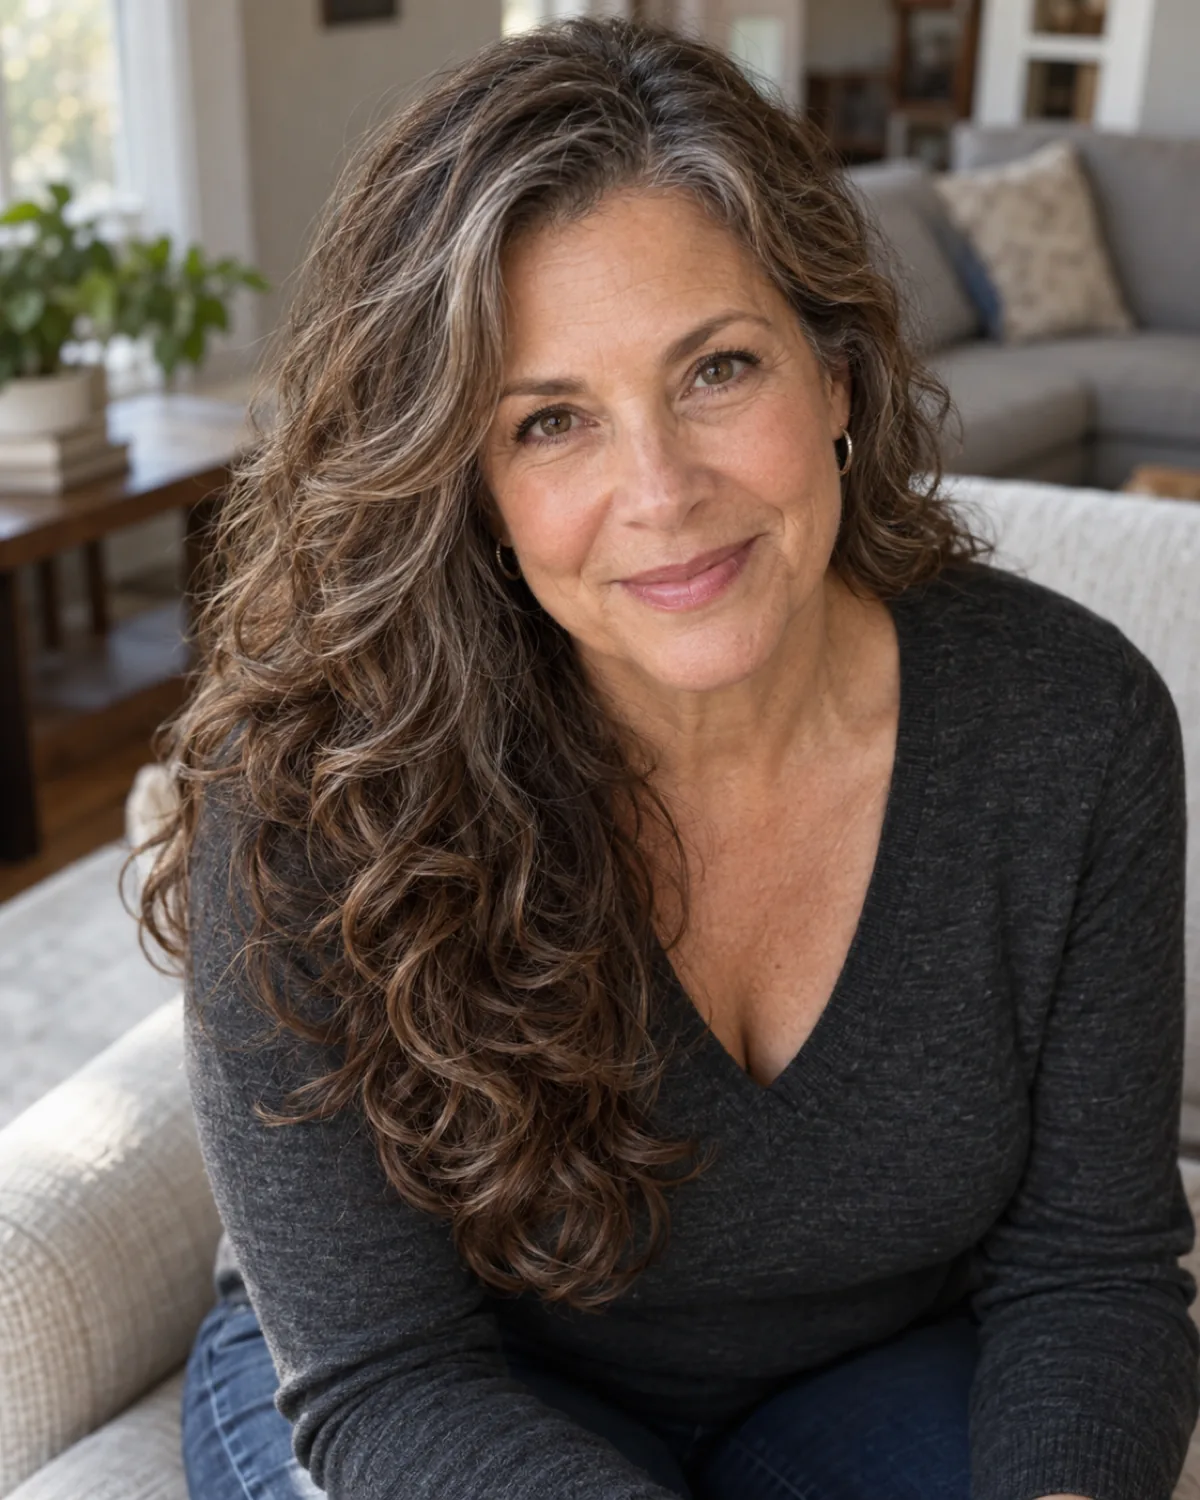
Graduated layers starting at the shoulder create movement without removing weight where gravity already thins the ends. The shorter layers curl more tightly than the longer sections below, and that contrast gives the cut its visual depth. Works on thick hair. Skip if your curl pattern loosens below the shoulder because the layers amplify the straight-at-the-bottom effect.
- Tell the stylist the first layer starts at the shoulder and the graduation works downward, not upward from the crown
- Ask for a dry cut because the layer placement depends on where each curl naturally springs back to
- Check from the side in a mirror because the graduated shape is most visible in profile
- If you want long hair after fifty but your curls need structure, this is the version that adds shape without sacrificing length
7. Curly Shag With Silver Streaks
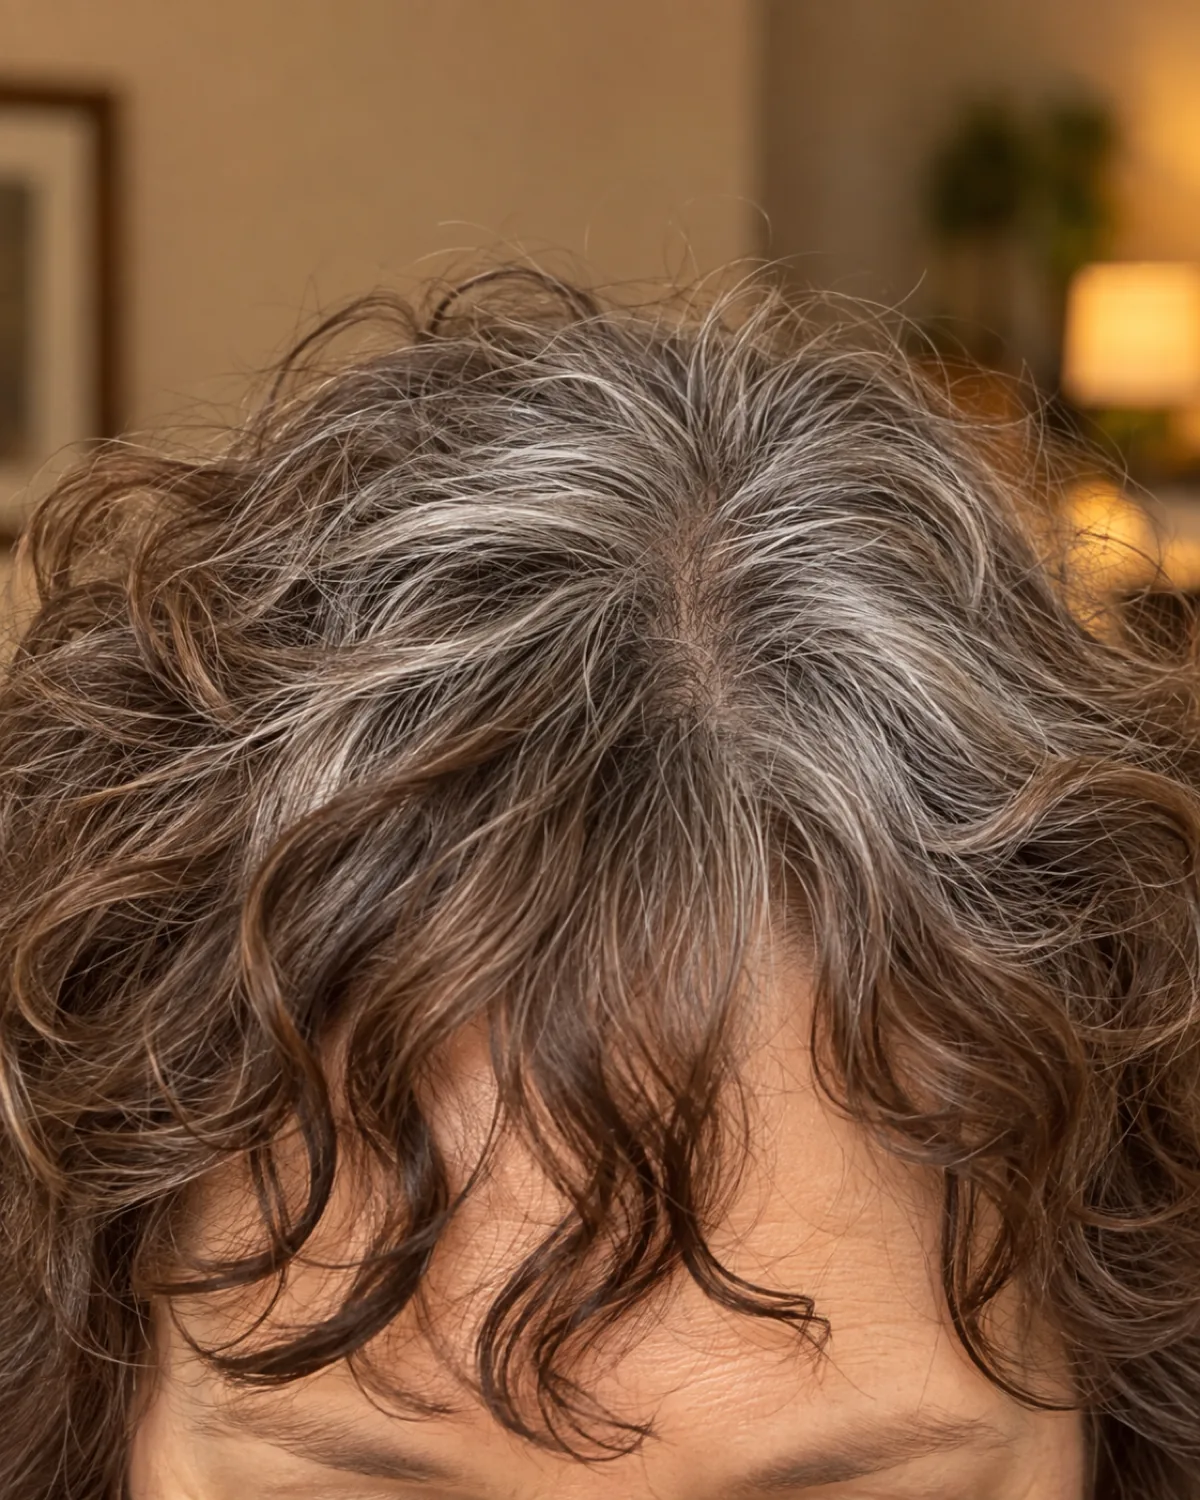
A mid-length shag on hair growing out dye. The silver streaks at two to three inches of root growth would look like neglect on a one-length cut, but the shag's disconnected layers break up the color boundary so it reads as intentional streaking. This is a transitional cut. Skip if gray is fully grown in because the shag works best with tonal variation.
- Ask the stylist to place the disconnected layers where the color change happens so the layers camouflage the demarcation line
- Cut dry so the stylist can see the exact curl-by-curl color transition
- This is the cut for the grow-out stage that the going gray guide covers in more detail
- Once the gray is fully in, revisit the cut because the shag that hid the transition may not be the shape you want at a uniform silver
8. Natural Curls Pulled Half-Up
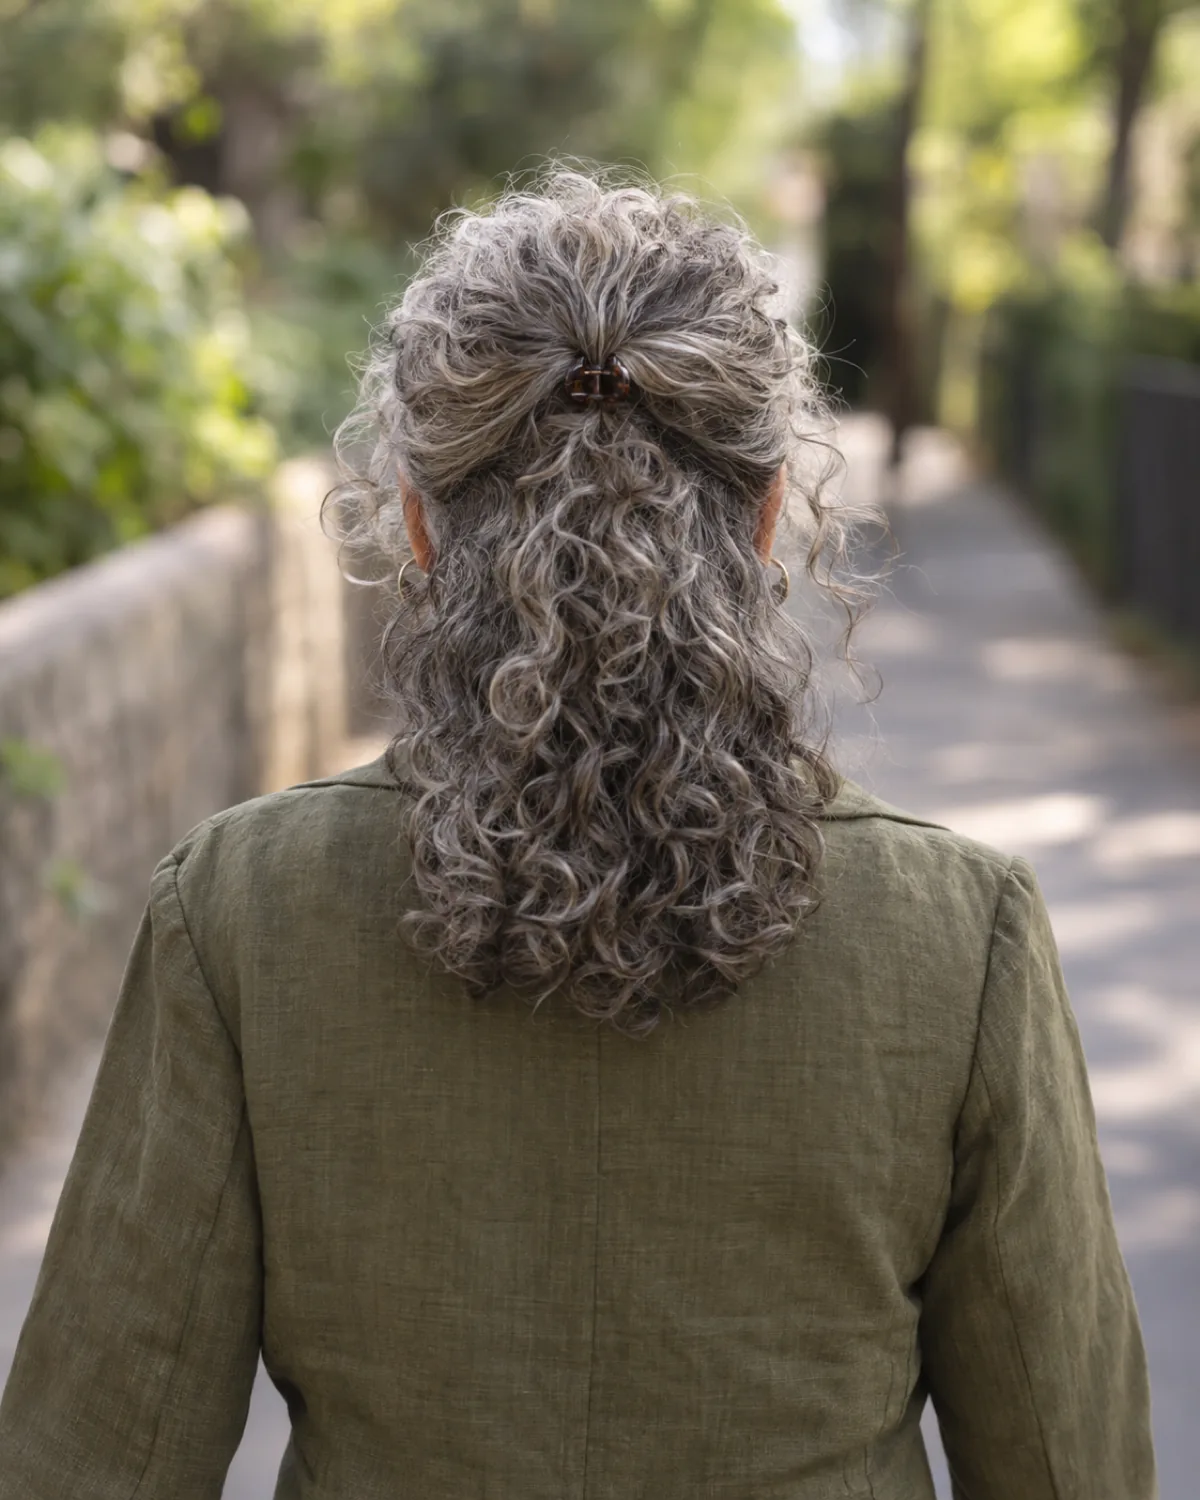
Not a cut but a styling decision for an existing medium-to-long curly cut. Pulling the top half up shows the curl pattern at the back while keeping face-framing curls loose at the sides. The judgment call is height: below the crown reads casual, at the crown reads polished. Works on all densities.
- Tell the stylist to cut face-framing pieces at chin length so they fall naturally when the rest is gathered
- Use a clip or soft tie rather than an elastic because elastics crease curly hair and the crease line shows when you take it down
- This works on any cut from this list so consider it a styling add-on rather than a separate idea
- If you pull the half-up point too high the bottom section looks thin so find the height where both halves carry equal visual weight
9. Long Curly Layers With Blunt Bangs
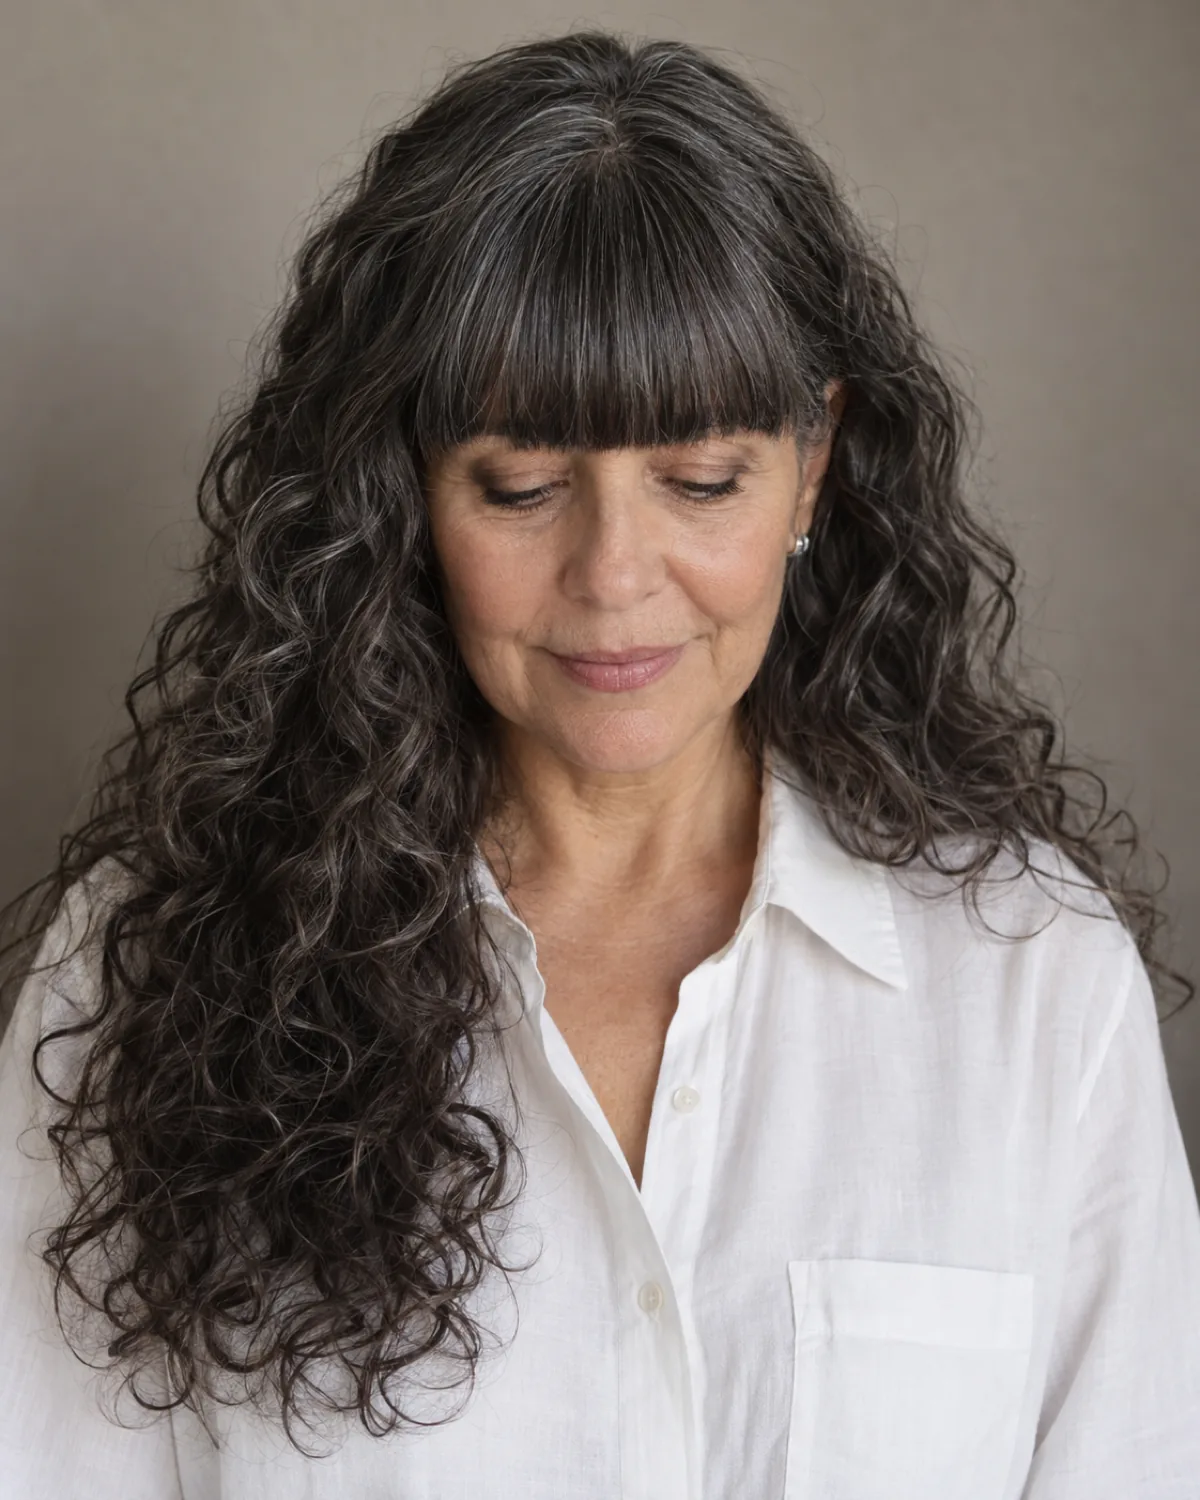
The contrast between the blunt fringe and the curly length is deliberate and reads as a style choice. The bangs are cut precisely straight while the rest is natural curls, and that tension is the whole point. Works only if the curl pattern stays consistent through the bang section. If curls go straight at the forehead the bangs will lie flat while the rest curls and that reads as a mistake.
- Cut the bangs dry and twenty percent longer than desired because curl shrinkage will shorten them within the hour
- Ask the stylist to check the hairline curl pattern specifically because the forehead section often has a different texture than the rest
- Blunt bangs on curly hair require trimming every three to four weeks because the shrinkage changes as the bang grows
- Read the bangs guide before committing because blunt bangs on curly hair are a higher-maintenance choice than they look
10. V-Cut on Long Natural Curls
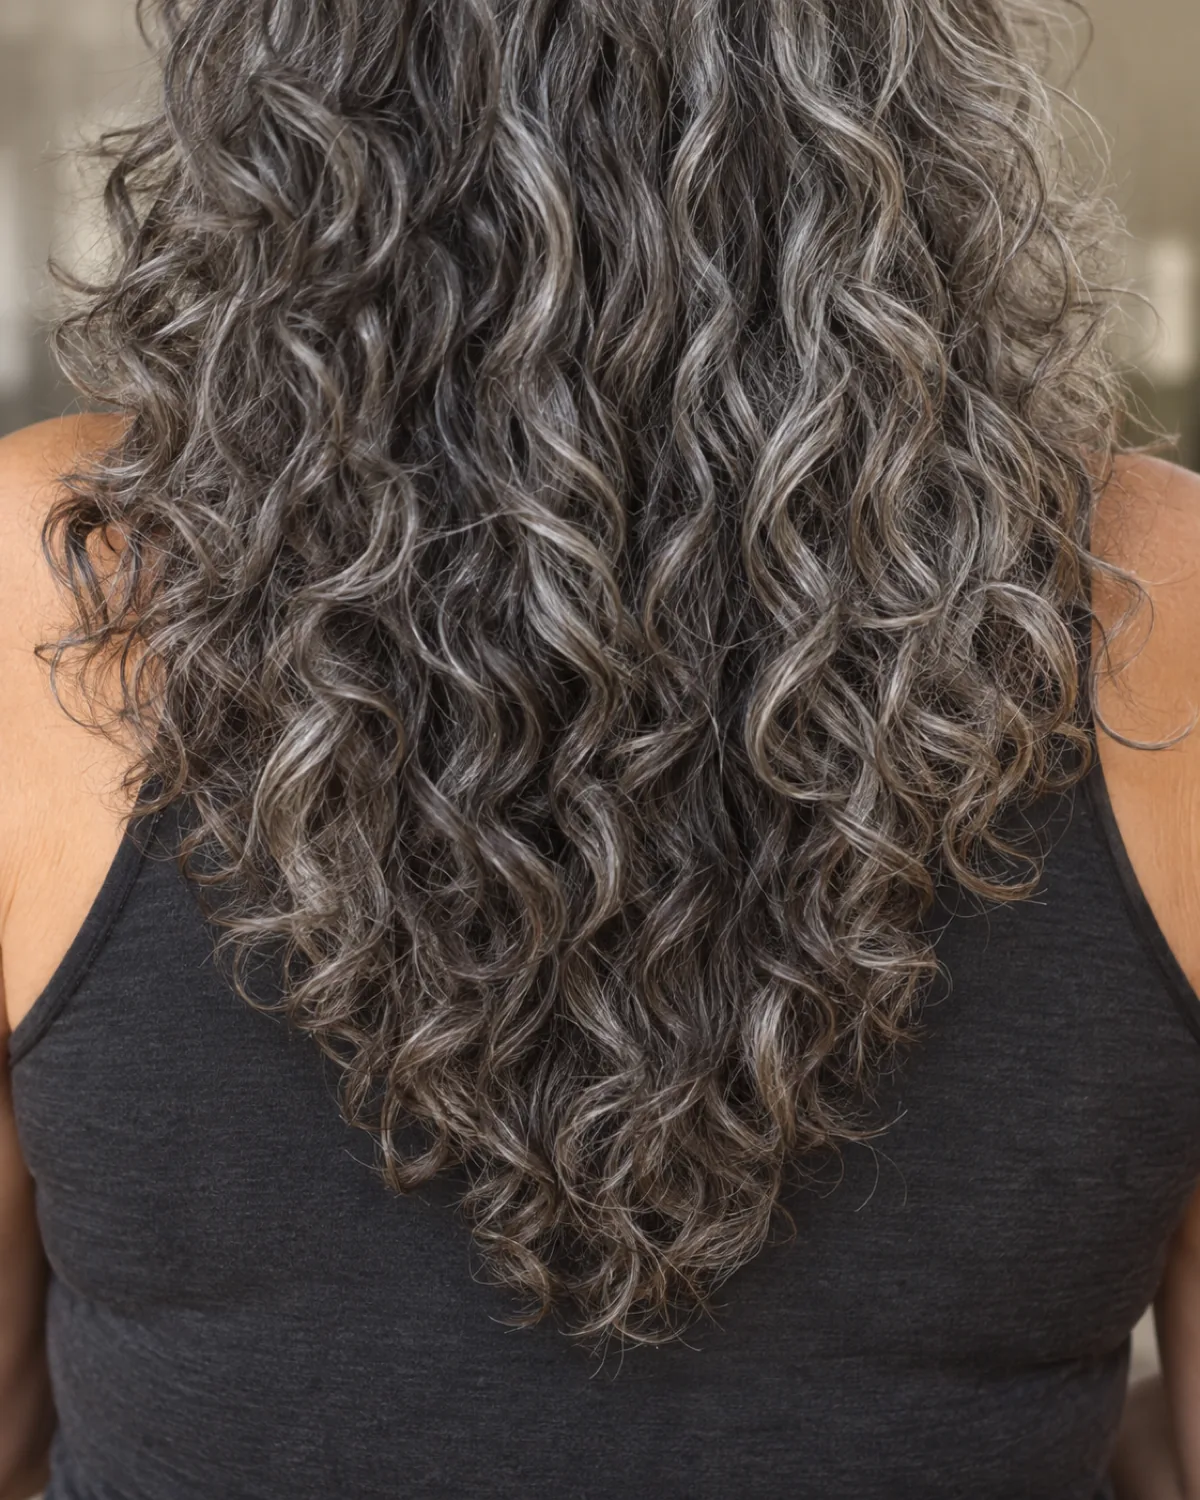
The V shape, cut with the center back longest and the sides tapering shorter, creates a rounded cascade when the curls spring back. The V removes weight from the sides without shortening the center, which is how thick curls get shape without losing length. Skip if hair is fine because the tapered sides thin the perimeter and the silhouette narrows into a column.
- Ask the stylist to cut the V when hair is pulled taut and then release it to see how the curls reshape the perimeter
- The deeper the V the more dramatic the cascade so start conservative and go deeper at the next trim if you want more shape
- Check the shape from behind in a mirror because the V is invisible from the front
- This works on the same hair that the long layered option serves but with shaping at the perimeter rather than through interior layers
11. Medium Curly Cut With Dry Shaping
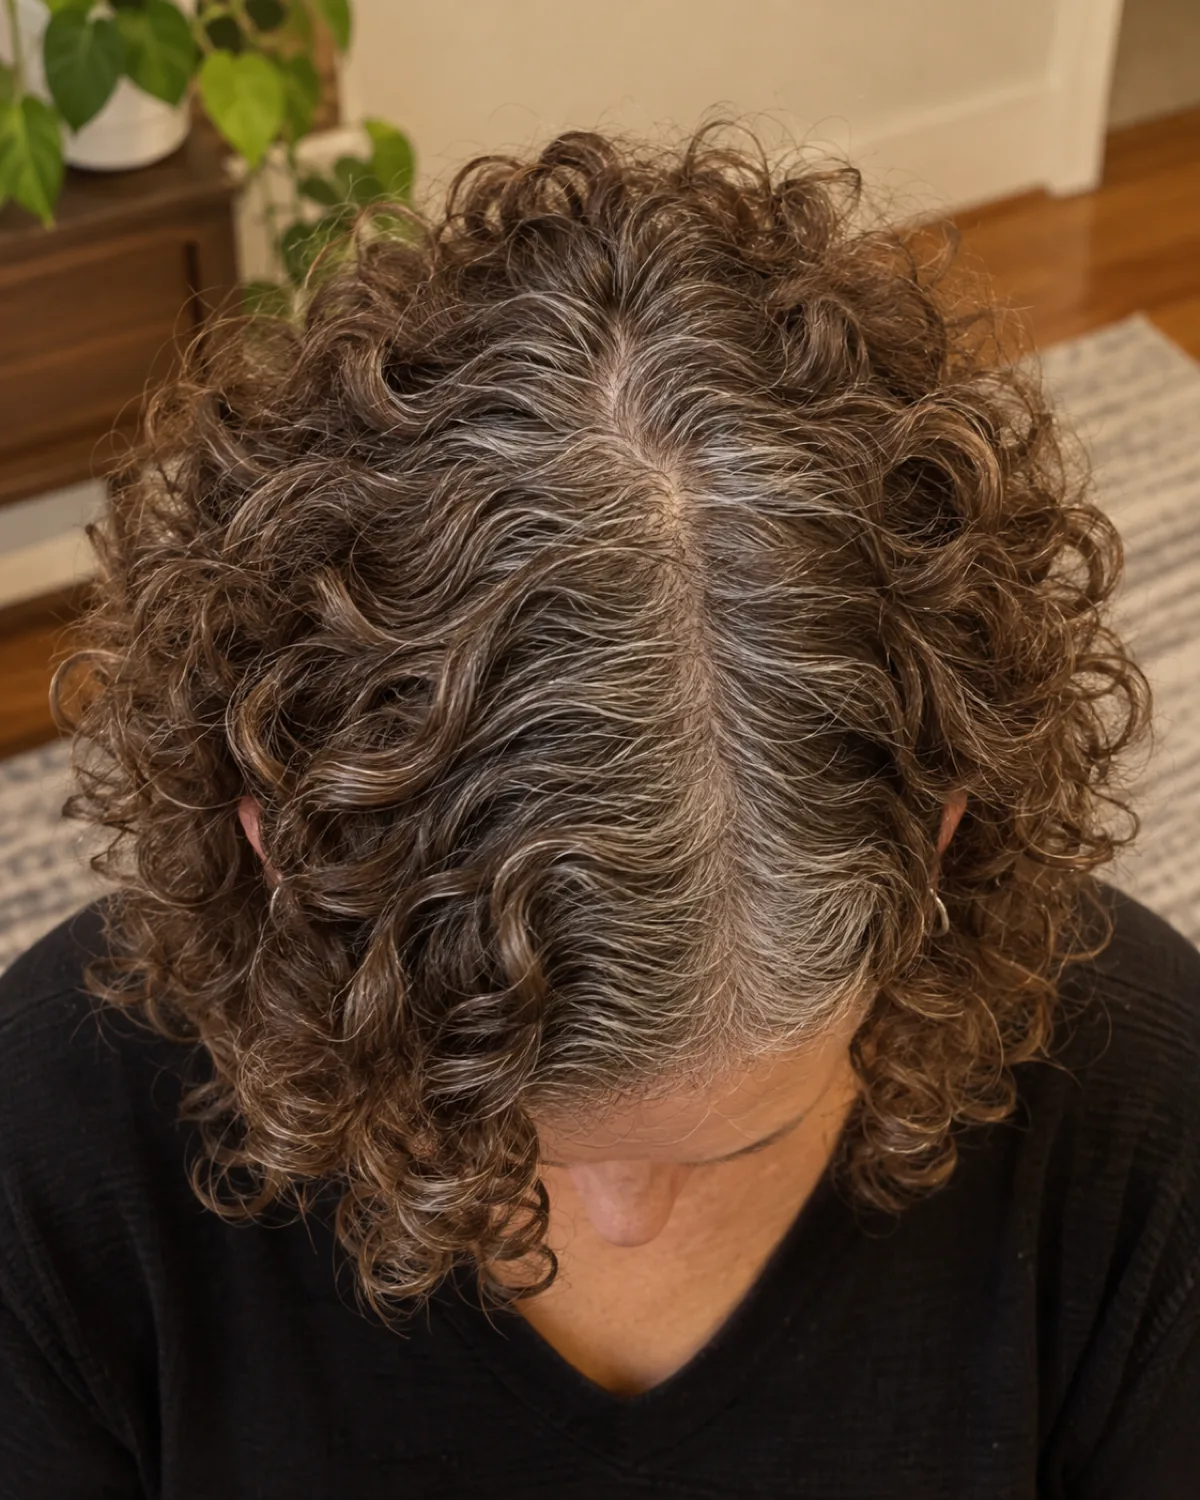
A shoulder-length cut done entirely dry, curl by curl. The stylist evaluates each curl's spring factor and cuts to the finished shape rather than cutting wet and hoping. Each curl sits at its natural length, the part line is clean, and the shape is the hair's own architecture. Requires a stylist trained in dry curly cutting.
- Ask whether the stylist has specific training in dry cutting curly hair before booking because wet-cut techniques applied dry do not produce the same result
- Expect this cut to cost more than a wet cut because it takes longer and requires curl-specific training
- The value is in the grow-out: a dry-shaped cut grows out more gracefully because each curl was addressed individually
- If your curl pattern varies across your head, this is the cut that addresses the inconsistency rather than averaging it
12. Natural Curls With an Undercut at the Nape
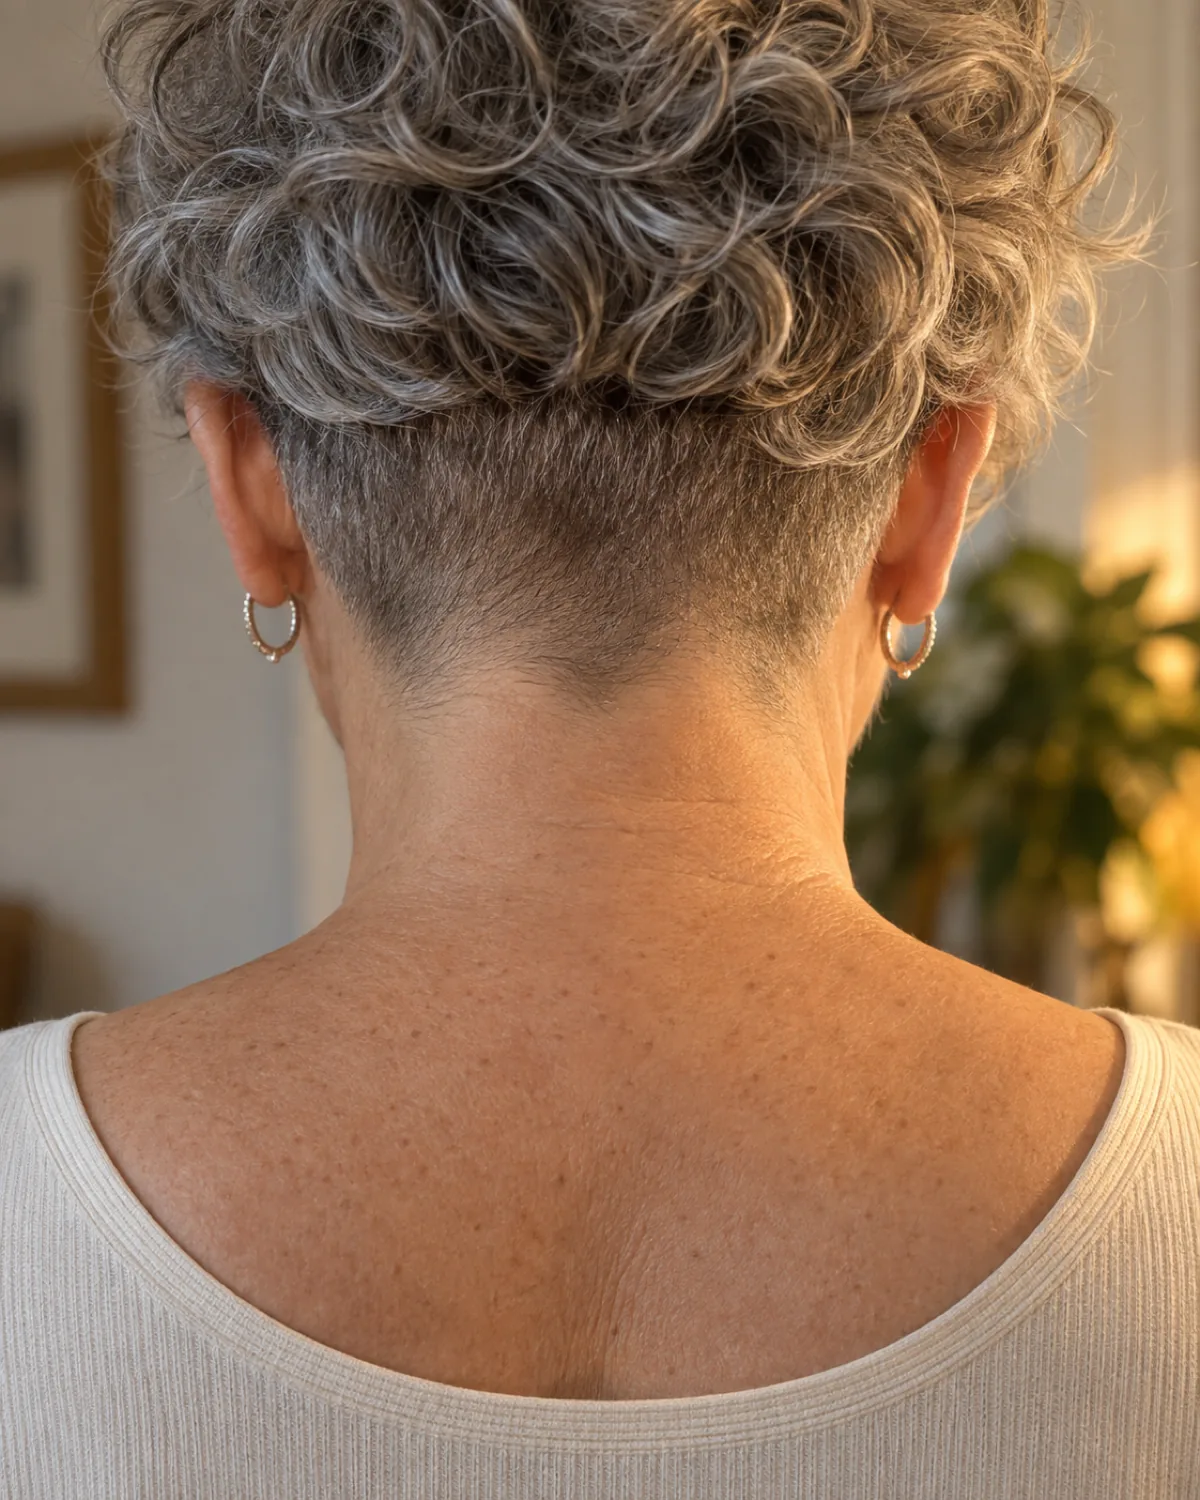
The nape section buzzed to a number two while the hair above the occipital bone stays at medium length with natural curls. The undercut removes bulk and heat without changing the visible silhouette when hair is down. The transition line between short and long is the engineering that matters. Works on thick, dense curls. Skip if you wear your hair up frequently because the buzzed section shows.
- Tell the stylist to keep the undercut line below the occipital bone so it is hidden when hair falls naturally
- Expect the buzzed section to need trimming every three to four weeks because the stubble grows unevenly
- Check the look with your hair both down and up before leaving the salon because you need to accept both versions
- If you want a short curly gray cut with undercut energy but are not ready to lose the length, this is the compromise
13. Shoulder-Length Curly Cut With Rounded Shape
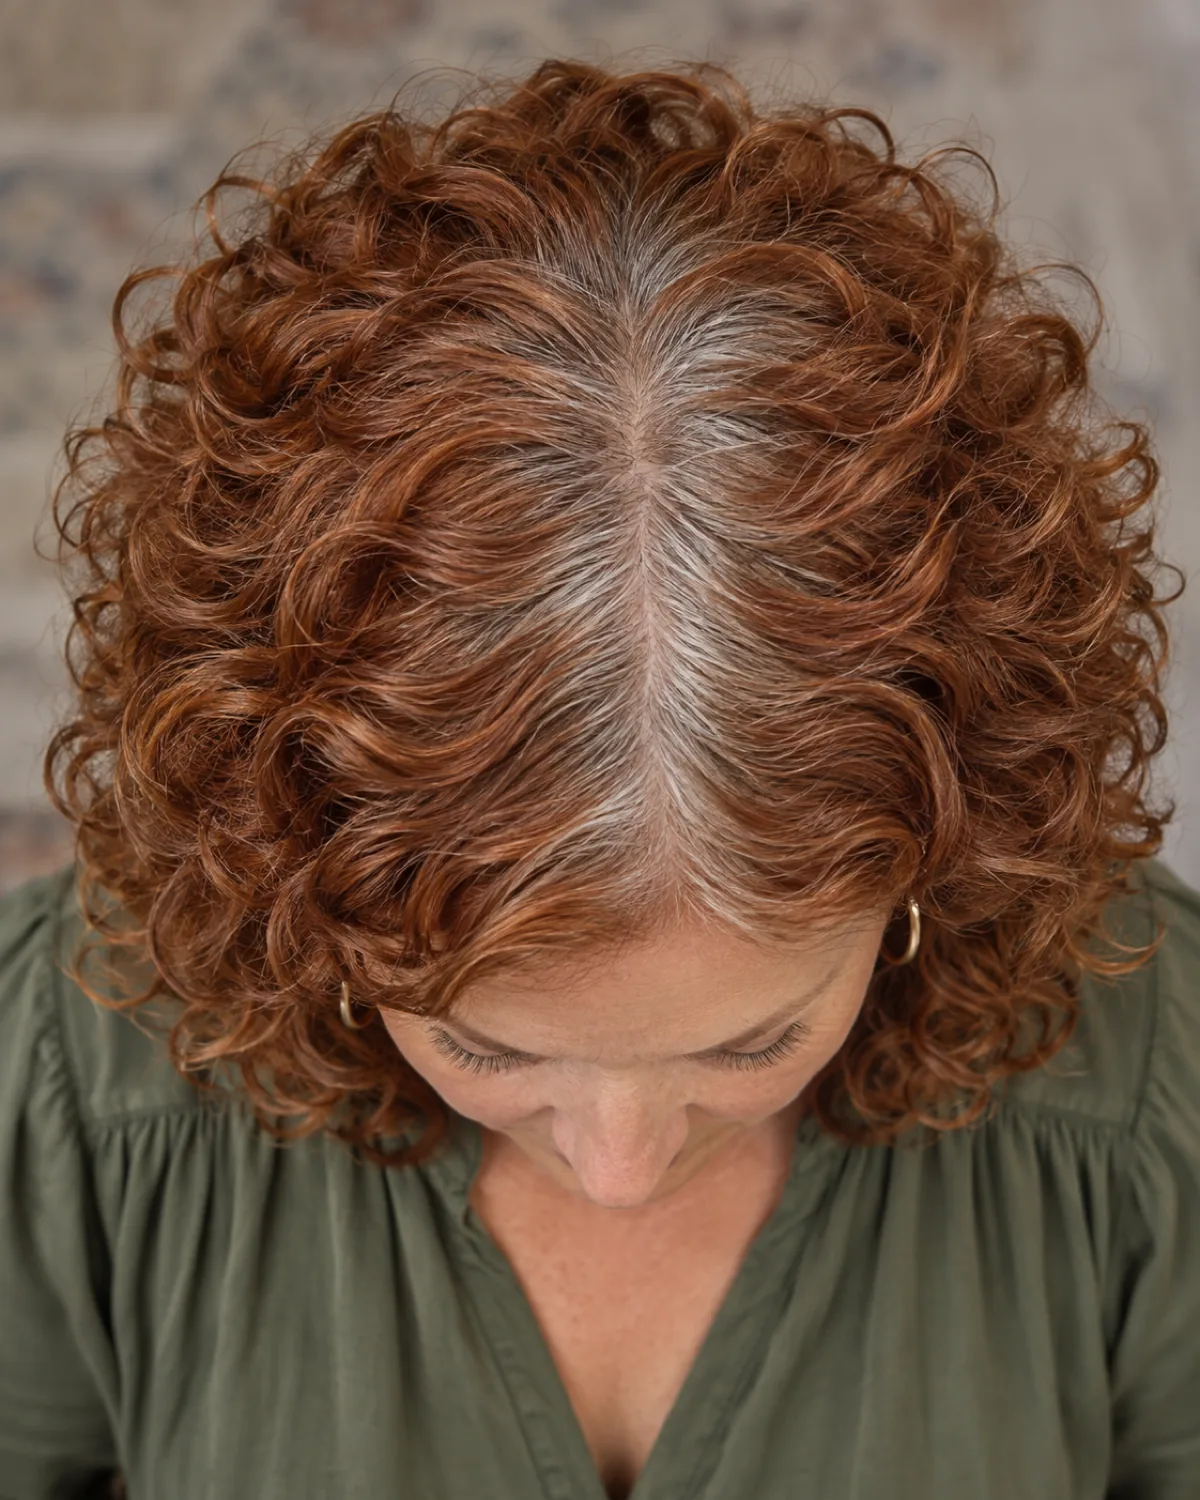
A one-length cut at the shoulder with the perimeter rounded rather than blunt. The rounded shape contains the curls into a soft silhouette that works on medium-density curls. The part line organizes the curl fall pattern and the rounded perimeter gives the whole shape a soft boundary rather than a sharp edge. Skip if curls are very tight because the contained shape reads helmet-like.
- Ask the stylist to round the shape from behind because the perimeter is most visible at the back
- A rounded cut grows out more evenly than a blunt cut because the perimeter does not develop a sharp line that shows the growth
- Check whether your curls fill the rounded shape naturally or whether you need product to maintain the silhouette because if you need product every day this cut is too high-maintenance
- If the rounded shape is too contained, the curly shag breaks it open with disconnected layers
14. Long Natural Curls With Minimal Layers
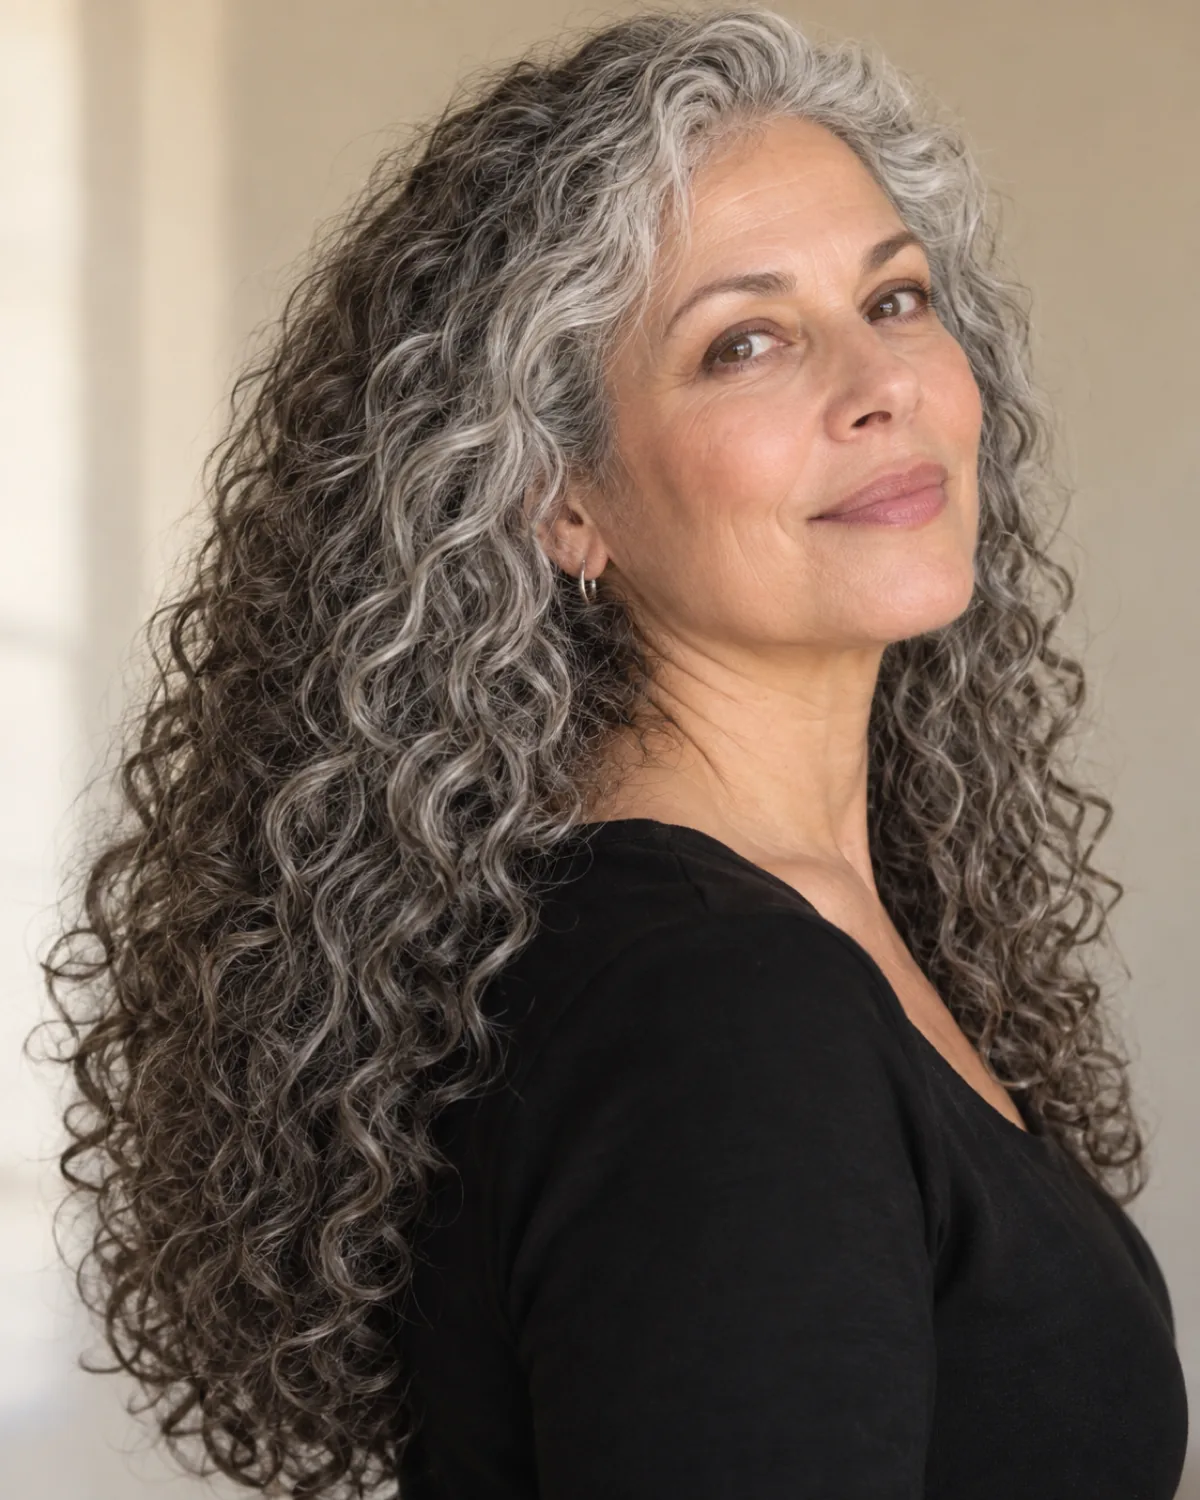
Hair at mid-back with only two or three long layers. The hands-off option: minimal shaping, maximum curl autonomy. Weight stretches the pattern longer than it would be at shorter length, and different curls end at slightly different lengths for a natural irregular hemline. Works when the pattern is consistent root to tip. Skip if you want crown volume because long heavy curls pull it flat.
- Tell the stylist you want two to three layers maximum and nothing above the shoulder
- Accept that the hemline will not be perfectly even because the different curl sizes end at different points and that irregularity is part of the look
- This is the cut for the woman who reads the long hair after fifty guide and decides she wants length over shape
- Check whether your ends are healthy enough to carry the weight without splitting because minimal layers put all the stress on the tips
15. Medium Curly Cut With Tapered Ends
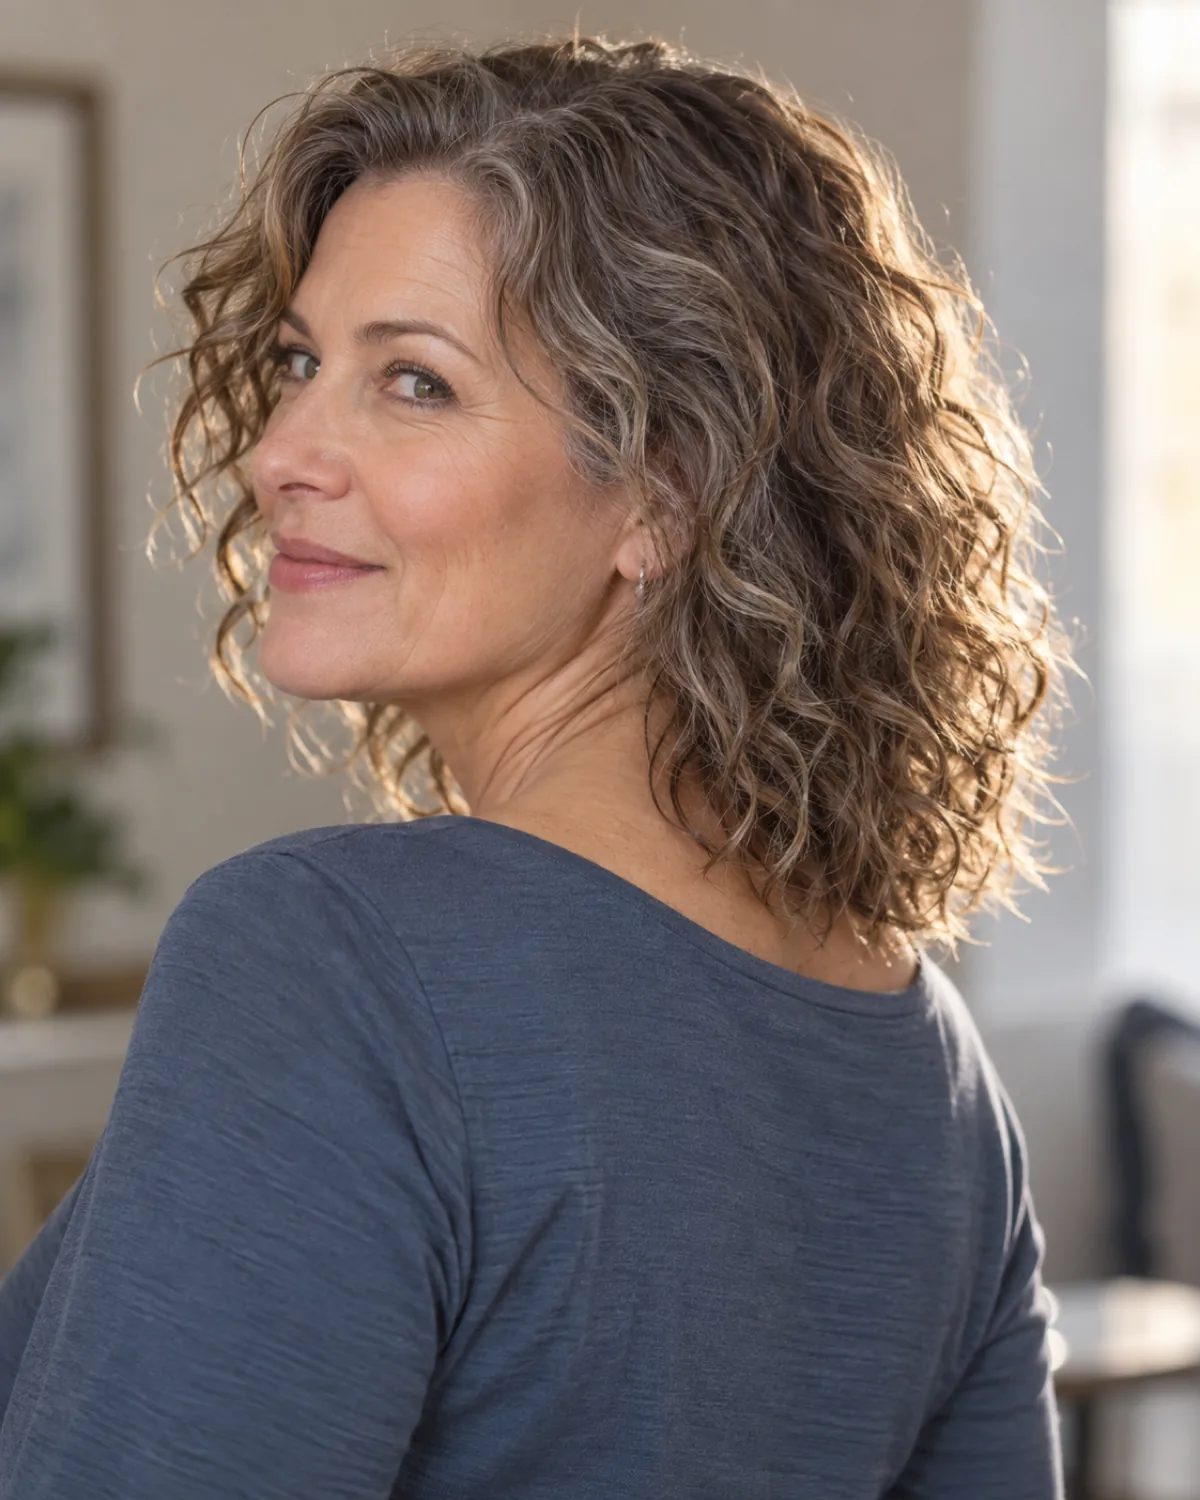
Shoulder-length curls with the last two inches point-cut for tapered ends. The taper prevents the blunt-hemline clumping that makes fine-to-medium curls look stringy at the bottom. The feathered tips catch light differently than blunt ends and read softer. Works on fine and medium curls. Skip if curls are thick and coarse because tapered ends on thick curly hair fray rather than feather.
- Ask for point-cutting rather than razor-cutting because the razor on post-pigment gray texture can shred the ends
- The taper starts two inches from the tips so tell the stylist you want the body of the hair left blunt for weight
- This solves the problem the collarbone lob creates on fine curls: the blunt hemline that shows gaps is replaced by a feathered edge that hides them
- Check the tapered ends after they dry because wet point-cutting can remove too much on curly hair
16. Natural Curly Hair at Any Length With a Defined Part
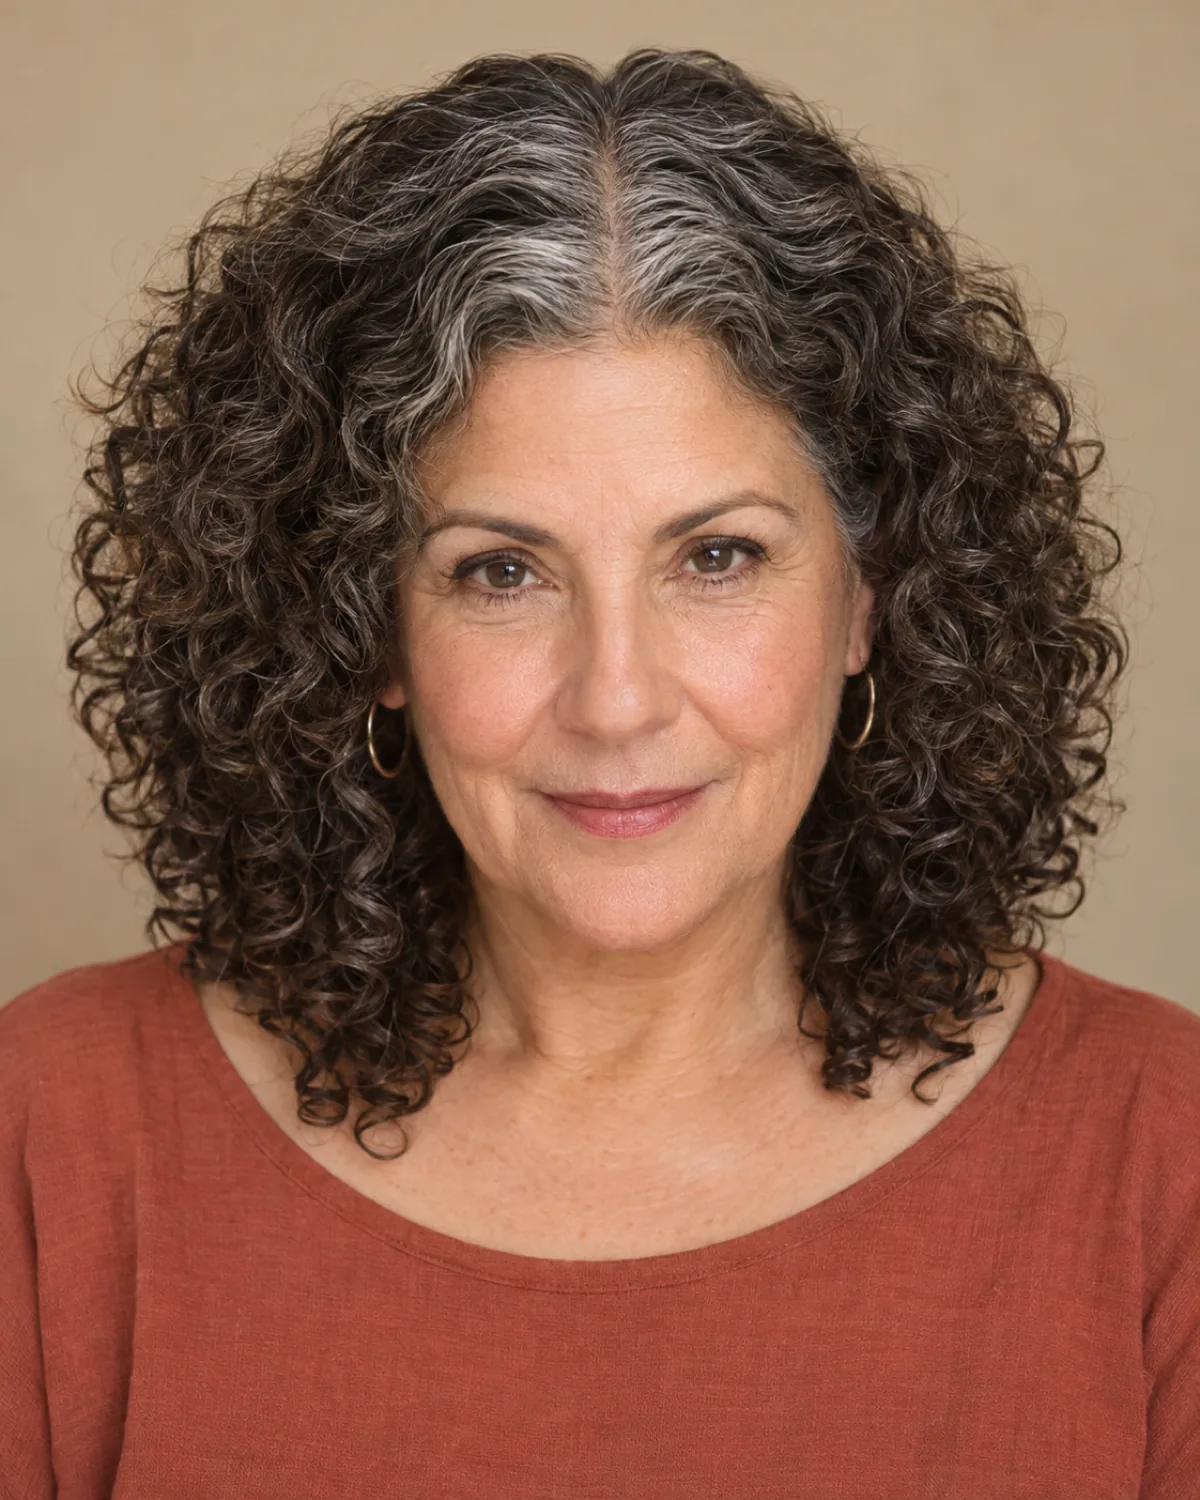
The part line is the most underrated element of a curly cut. A defined part organizes the curl fall pattern and creates root lift where the hair separates. Whatever length you choose from this list, settle the part first because it determines where volume lands and where scalp shows. Neither center nor side is better, but one suits your face shape.
- Ask the stylist to cut around the part you actually wear rather than the one that appears when hair is wet because the wet part and the dry part land in different places on curly hair
- Try both a center part and a deep side part for a week each before your appointment so you arrive knowing which one your curls prefer
- The part line is where silver shows first so decide whether you want to highlight that or minimize it because the part width controls how much root is visible
- A defined part is the single change you can make tonight without a salon visit and it will shift how every cut on this list looks on you
The curl pattern you had at thirty may not be the curl pattern you have now. Hair diameter, texture, and density all change after fifty, and a cut that worked on younger curls may not land the same way on the curls sitting on your head today. Bring your actual hair to the appointment, not a memory of what it used to do.
Where the checkable claims come from
- Why Does Hair Change with Age? — American Academy of Dermatology
- Understanding Graduation and Layering — Sam Villa / Redken Education
- The Curly Girl Method: A Beginner's Guide — NaturallyCurly
Keep this one
Save it for the appointment
Pin the image above to the board you actually open before a salon visit. This guide is written to be re-read, not read once.
Tonight, before you close this tab
- Wash your hair and let it air-dry without touching it then photograph the front side and back to see your curl pattern as it actually falls because this set of three photos is what your stylist needs
- Measure a single curl from root to tip when stretched versus when released to calculate your shrinkage percentage because that number is the gap between the length you want and the length the stylist has to cut
- Identify which section of your head has the tightest curl and which has the loosest then tell your stylist both because a good curly cut addresses the inconsistency instead of averaging it
- Write down how many minutes you spend on your hair each morning and bring that number to the salon because it determines whether layers bangs or a shag are realistic for you